Drag and Drop in React without using any External Library
- General
Drag and Drop in React without using any External Library
This blog will explain the way to achieve drag and drop feature in React with little effort. It is easy to use feature that adds great convenience to your users. But, it’s always an enormous task if implemented using jQuery or vanilla JavaScript because it will include huge calculations counting on its implementation. But, React comes up very handy in drag and drop feature using useRef hook. Here, we’ll see it in action by implementing an easy drag and drop list. Find the live implementation and code for the sample project below.
Now let’s see step by step how easy it’s to implement a dnd feature in React.
STEP 1 : Create List and make its items draggable
Firstly, let’s create a list with its items being draggable. All we have to do here is to pass the draggable prop to every div which is making the items draggable. Hence on drag operation, you can see a shadow of list items moving around. Find the code below:
|
1 2 3 4 5 6 7 8 9 10 11 12 |
import React, { useState, useRef } from 'react'; import './App.css'; const App = () => { const [list, setList] = useState(['Item 1','Item 2','Item 3','Item 4','Item 5','Item 6']); return ( <> { list && list.map((item, index) => ( |
))} </> ); }; export default App;
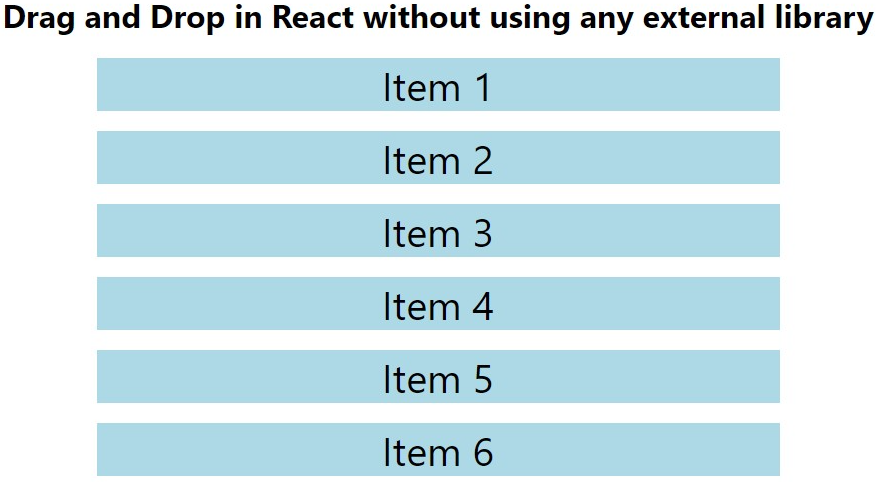
The output will look similar to the image shown bellow:

STEP 2 : Track the item getting dragged
Secondly, we have a list with draggable items. At a given time, only one item can be in the drag state. Hence, we will be using useRef hook to keep track of the item being dragged by its position. We will use onDragStart event listener for this and will attach it to every item of the list. Find the code below:
|
1 2 3 4 5 6 7 8 9 10 11 12 13 14 15 16 17 18 |
import React, { useState, useRef } from 'react'; import './App.css'; const App = () => { const dragItem = useRef(); const [list, setList] = useState(['Item 1','Item 2','Item 3','Item 4','Item 5','Item 6']); const dragStart = (e, position) => { dragItem.current = position; console.log(e.target.innerHTML); }; return ( <> { list && list.map((item, index) => ( |
))} </> ); }; export default App;
STEP 3 : Track the items getting dragged over
Thirdly, we have to find over which item our dragged item is hovering at a given time. For this we can use another useRef hook and change it every time our item hovers on another item. We will use onDragEnter event listener for this. Find the code below:
|
1 2 3 4 5 6 7 8 9 10 11 12 13 14 15 16 17 18 19 20 21 22 23 24 |
import React, { useState, useRef } from 'react'; import './App.css'; const App = () => { const dragItem = useRef(); const dragOverItem = useRef(); const [list, setList] = useState(['Item 1','Item 2','Item 3','Item 4','Item 5','Item 6']); const dragStart = (e, position) => { dragItem.current = position; console.log(e.target.innerHTML); }; const dragEnter = (e, position) => { dragOverItem.current = position; console.log(e.target.innerHTML); }; return ( <> { list && list.map((item, index) => ( |
))} </> ); }; export default App;
STEP 4 : Reshuffle the list
Thirdly, and most importantly, our final step is to reshuffle the list when you finally drop the item over any of the other item. Till now we already have the index of the dragged child and the child over which its dragged making our list to reshuffle. Find the code below:
|
1 2 3 4 5 6 7 8 9 10 11 12 13 14 15 16 17 18 19 20 21 22 23 24 25 26 27 28 29 30 31 32 33 34 |
import React, { useState, useRef } from 'react'; import './App.css'; const App = () => { const dragItem = useRef(); const dragOverItem = useRef(); const [list, setList] = useState(['Item 1','Item 2','Item 3','Item 4','Item 5','Item 6']); const dragStart = (e, position) => { dragItem.current = position; console.log(e.target.innerHTML); }; const dragEnter = (e, position) => { dragOverItem.current = position; console.log(e.target.innerHTML); }; const drop = (e) => { const copyListItems = [...list]; const dragItemContent = copyListItems[dragItem.current]; copyListItems.splice(dragItem.current, 1); copyListItems.splice(dragOverItem.current, 0, dragItemContent); dragItem.current = null; dragOverItem.current = null; setList(copyListItems); }; return ( <> { list && list.map((item, index) => ( |
))} </> ); }; export default App;
STEP 5 : Eliminate drag over animation effect
Moreover, while we drop the dragging item, we can see it’s shadow is going back to it’s original place. This can make user feel that dnd is not happening. We will avoid it by adding following line in every item element.
|
1 |
onDragOver={(e) => e.preventDefault()} |
The output is shown bellow:
Additional feature (Optional)
We can see that our list reshuffles on every drop. But can also do it whenever the dragged item comes over another item. It can be done by merging the two functions dragEnter and drop. Also, we will change the dragItem ref to the dragOverItem ref after reshuffle. This will make sure that onDragEnter runs every time when the dragged item comes over another item.
Conclusion
That’s all folks! In this blog, we have seen that implementing dnd is easier than you might have ever believed.
If you find any difficulty in understanding code or any concept feel free to reach out in the comment section.
Thanks you!
Related content
Auriga: Leveling Up for Enterprise Growth!
Auriga’s journey began in 2010 crafting products for India’s
