
- General
Facebook Pixel Integration in WordPress

Facebook Pixel Integration in WordPress
What is a Facebook Retargeting Pixel?
Have you noticed that after you visit a website, you start seeing its ads on Facebook? This is called retargeting or remarketing.
Those websites use Facebook’s retargeting technology, commonly known as Facebook Pixel or Meta Pixel.
The retargeting pixel does not add anything visible to your website. It simply sends a browser cookie to your visitors.
This allows Facebook to retarget users visiting your website on Facebook.
Why Use Facebook Retargeting Pixel
When you boost Facebook page posts using Facebook ads, you can select a wide range of target audiences. Retargeting allows you to narrow your audience and get better results with less spending.
You can show your ads to people who are already interested in your website. These people are much more likely to respond to your boosted posts and advertisements on Facebook.
How to Add Facebook Pixel in WordPress
Are you interested in delving into retargeting ads on Facebook and considering the integration of the Facebook pixel into your WordPress platform?
The solution is here;
Within this blog post, we will guide you through a comprehensive step-by-step process of adding the Facebook pixel to your WordPress website. This procedure will enable you to seamlessly establish the foundation for running retargeting ads with precision and efficacy.
Let’s take a look at how you can add a Facebook retargeting pixel to your WordPress site.
Two approaches exist for incorporating the Facebook pixel into your website:
- Manual Integration
- Plugin Integration.
In this context, we will be focusing on the initial method, which involves
- Manual Integration.
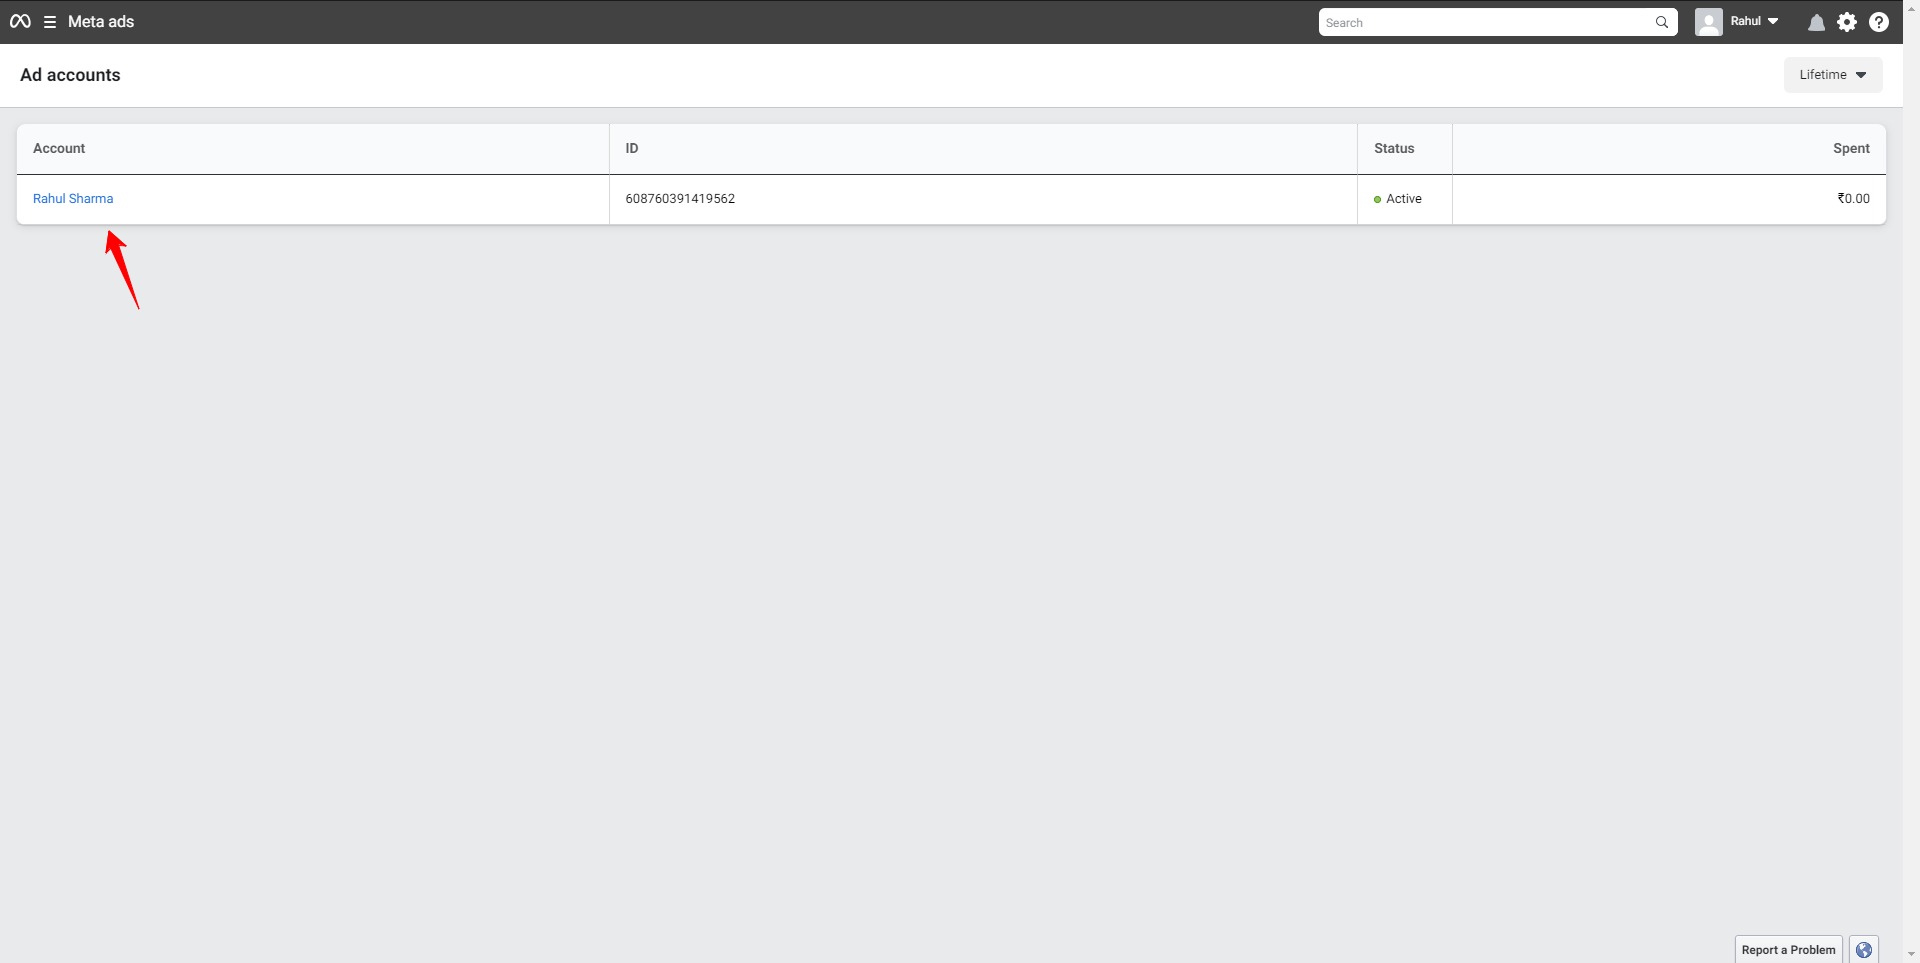
As a first step, navigate to the Facebook Ads Manager.
As a next step, click on the first search result URL that you come across.
As a next step, proceed to access the Ads Manager.
As a next step, click on “Start now” button and create your account.
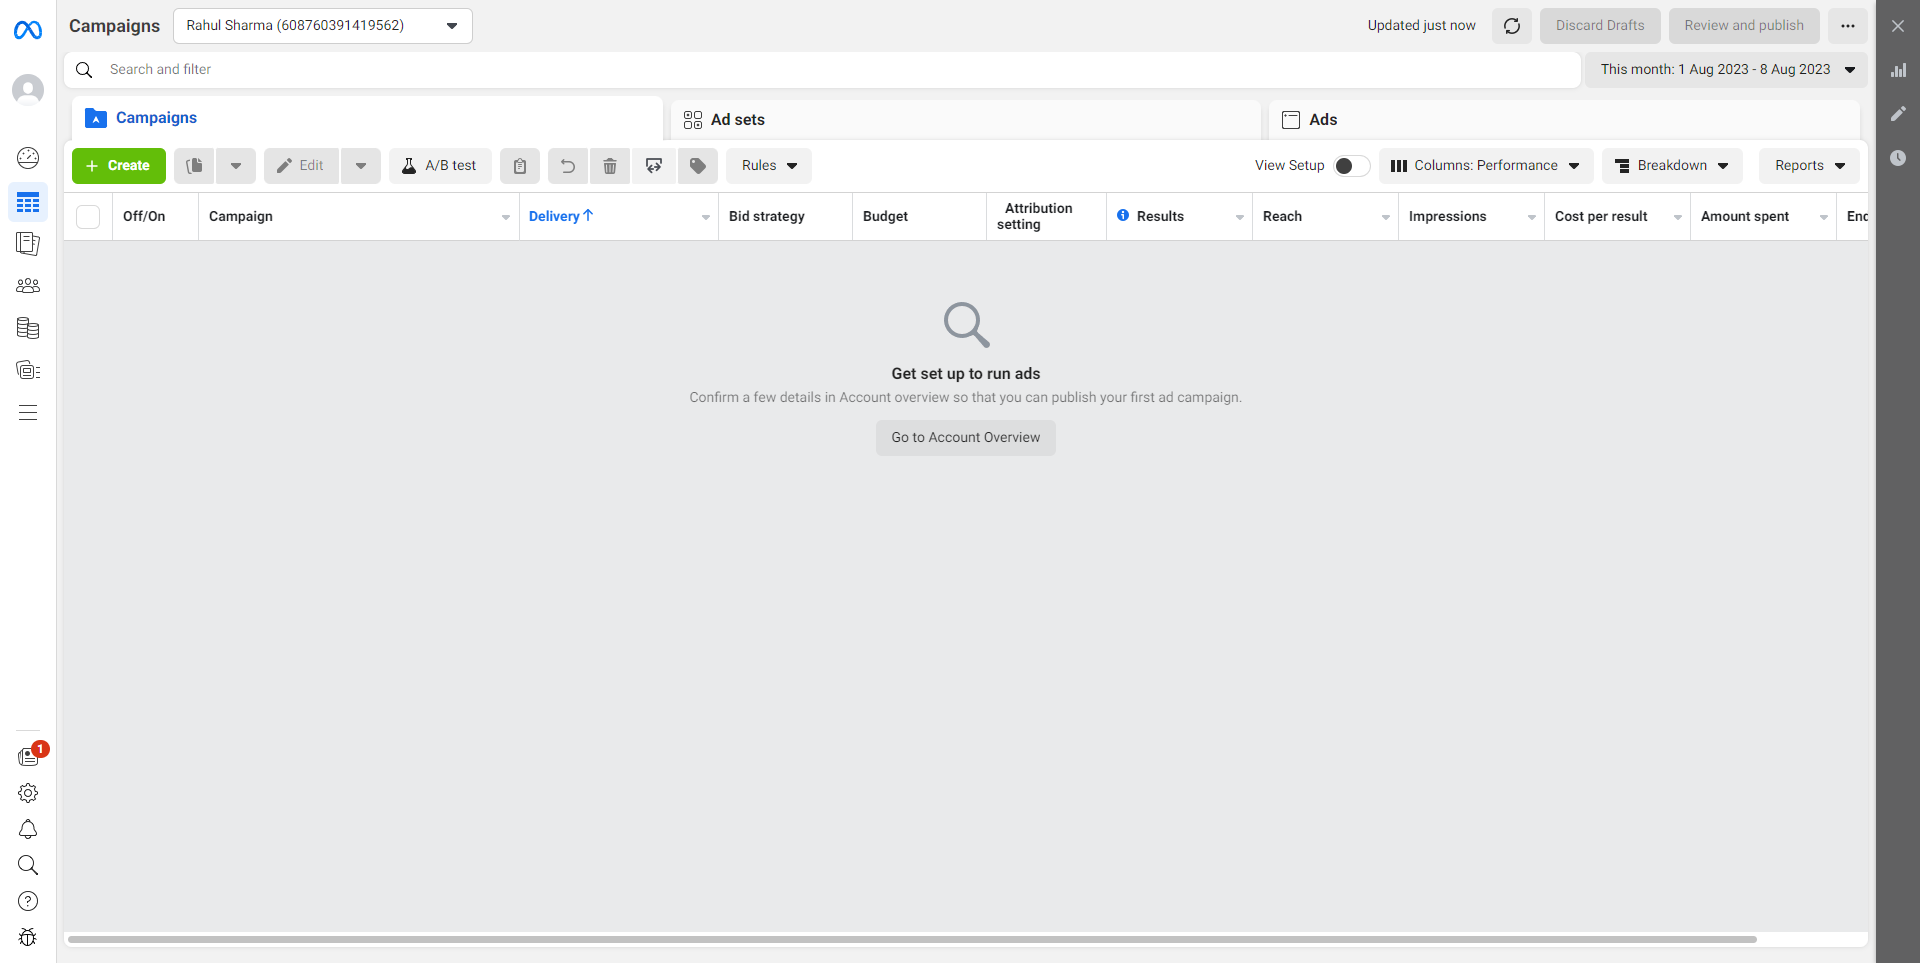
As a next step, upon selecting the designated account, a dashboard will promptly appear for your view.
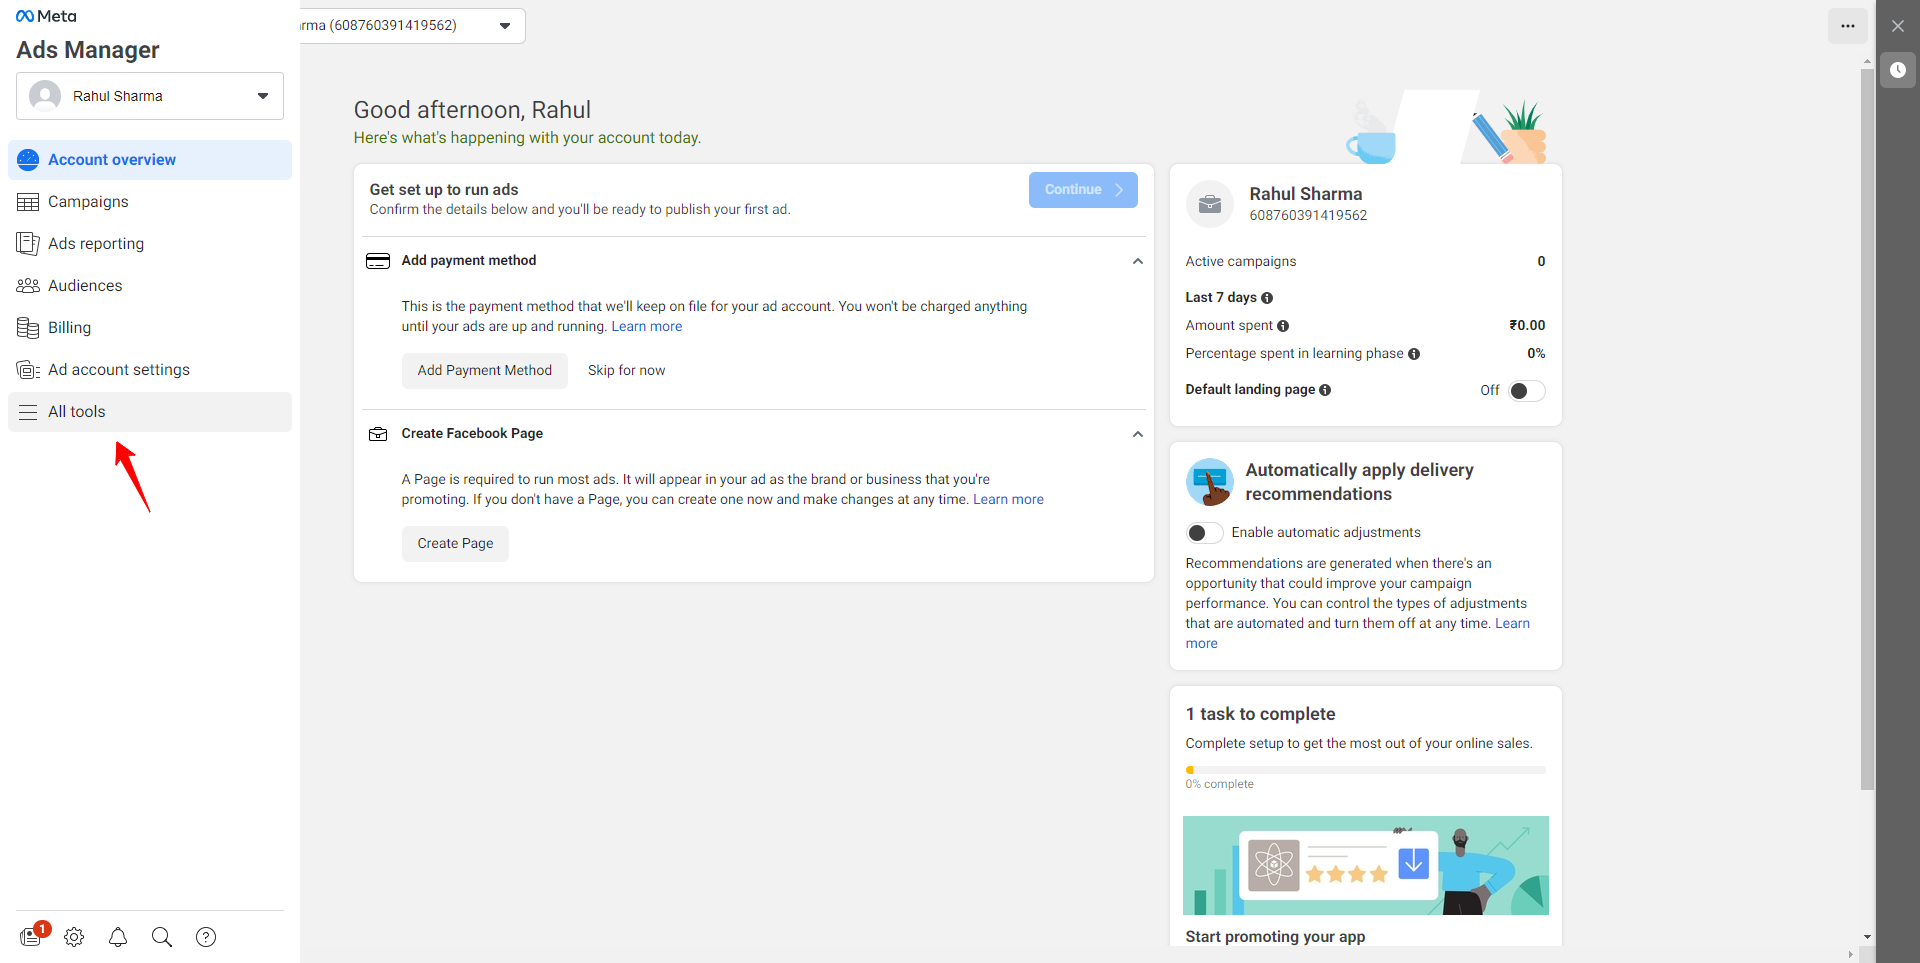
As a next step, subsequently, navigate your cursor to the left sidebar and click on “All Tools“.
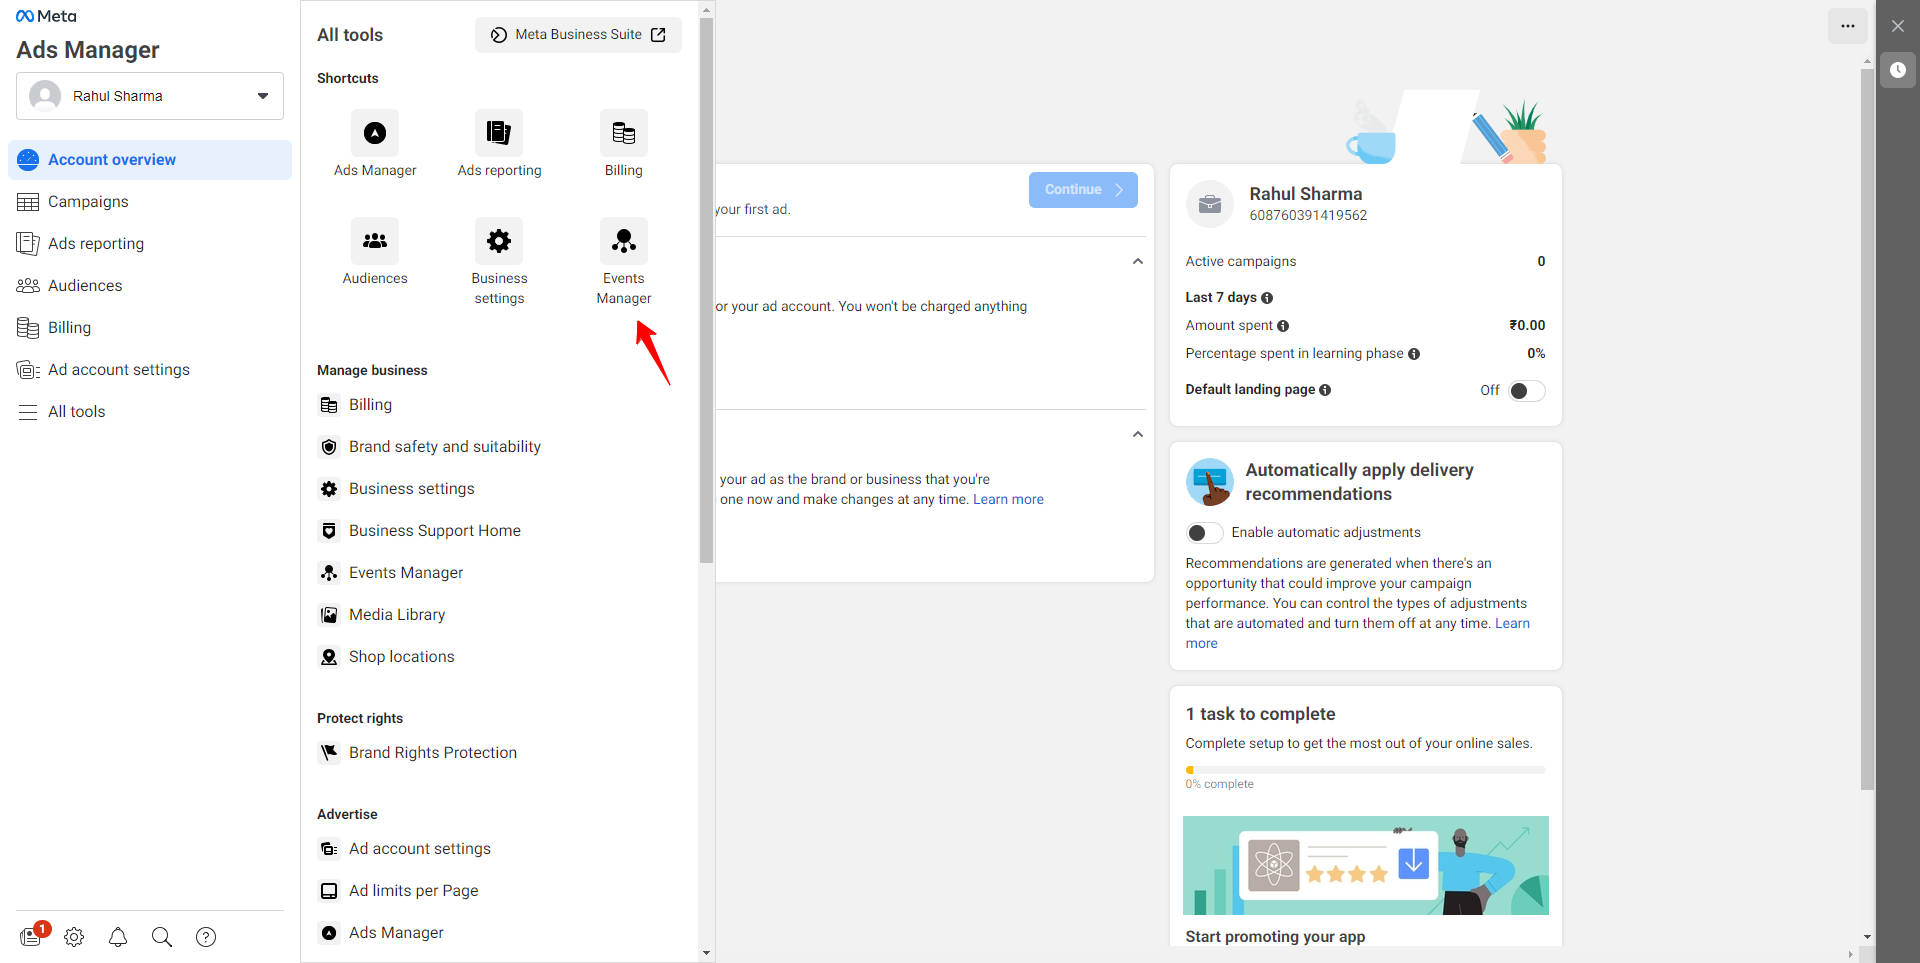
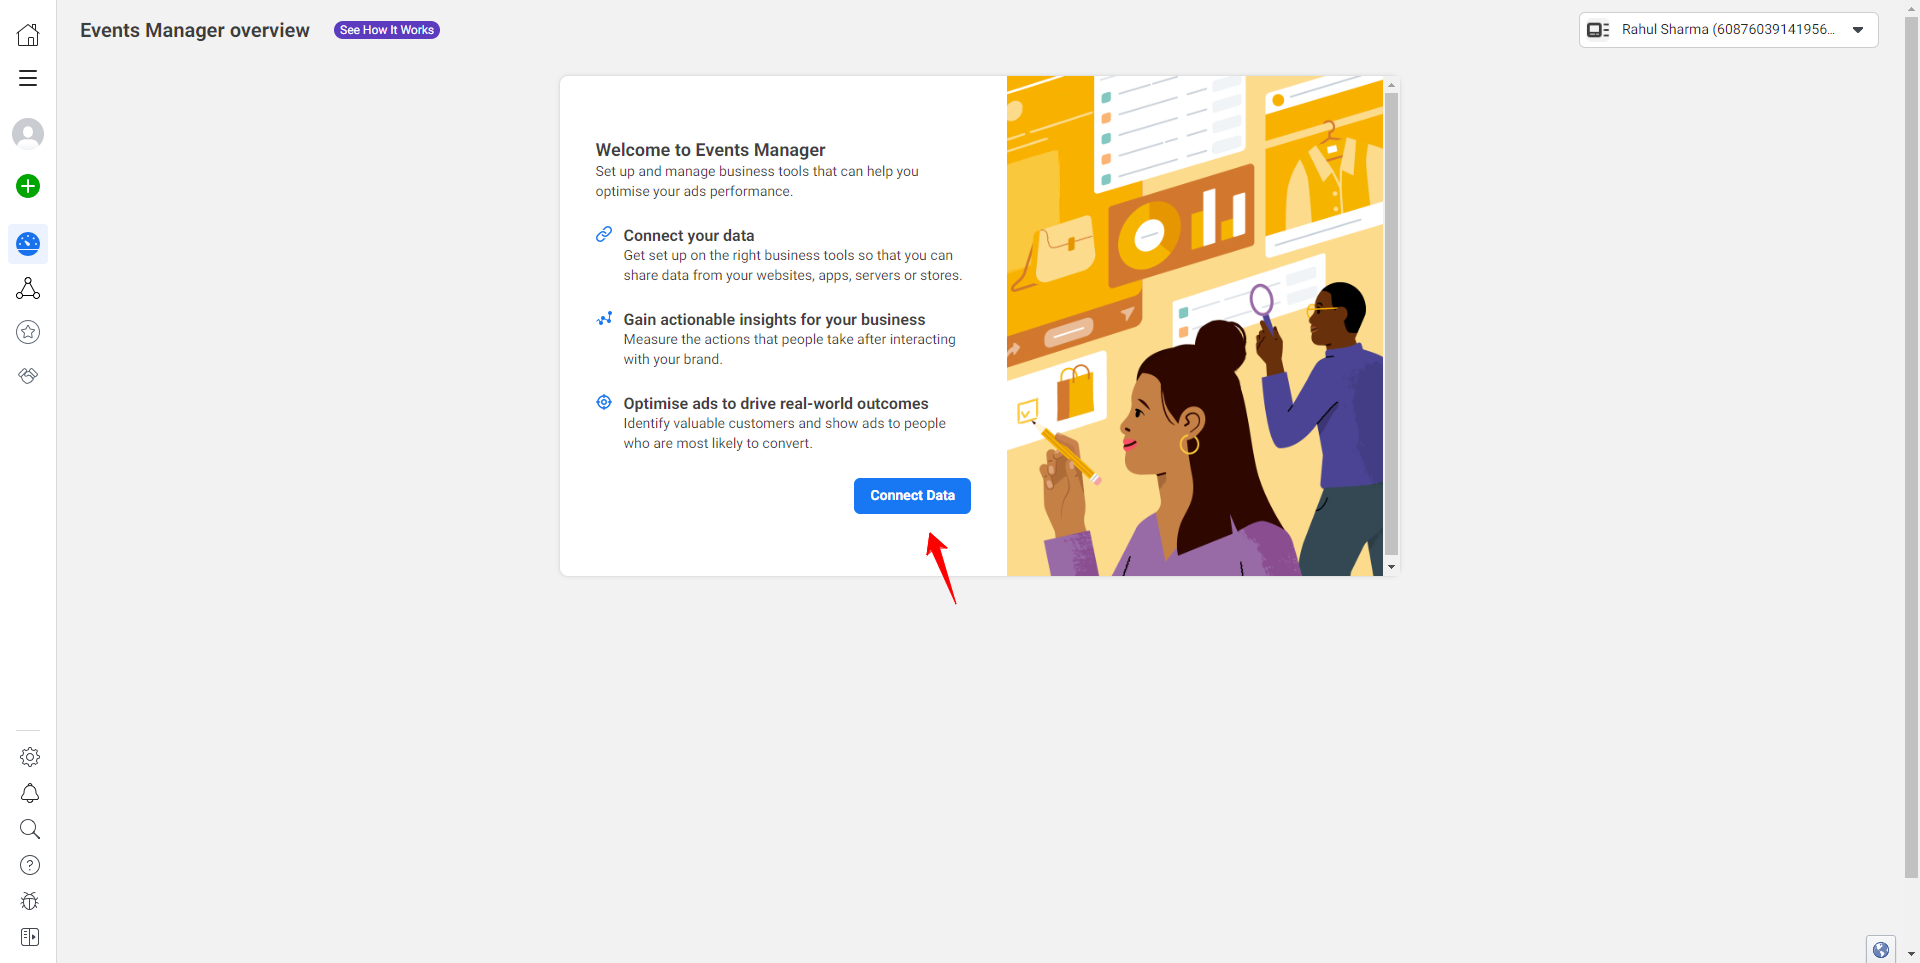
As a next step, opt for “Events Manager” from the available options.
As a next step, proceed by clicking on the “Connect Data” option.
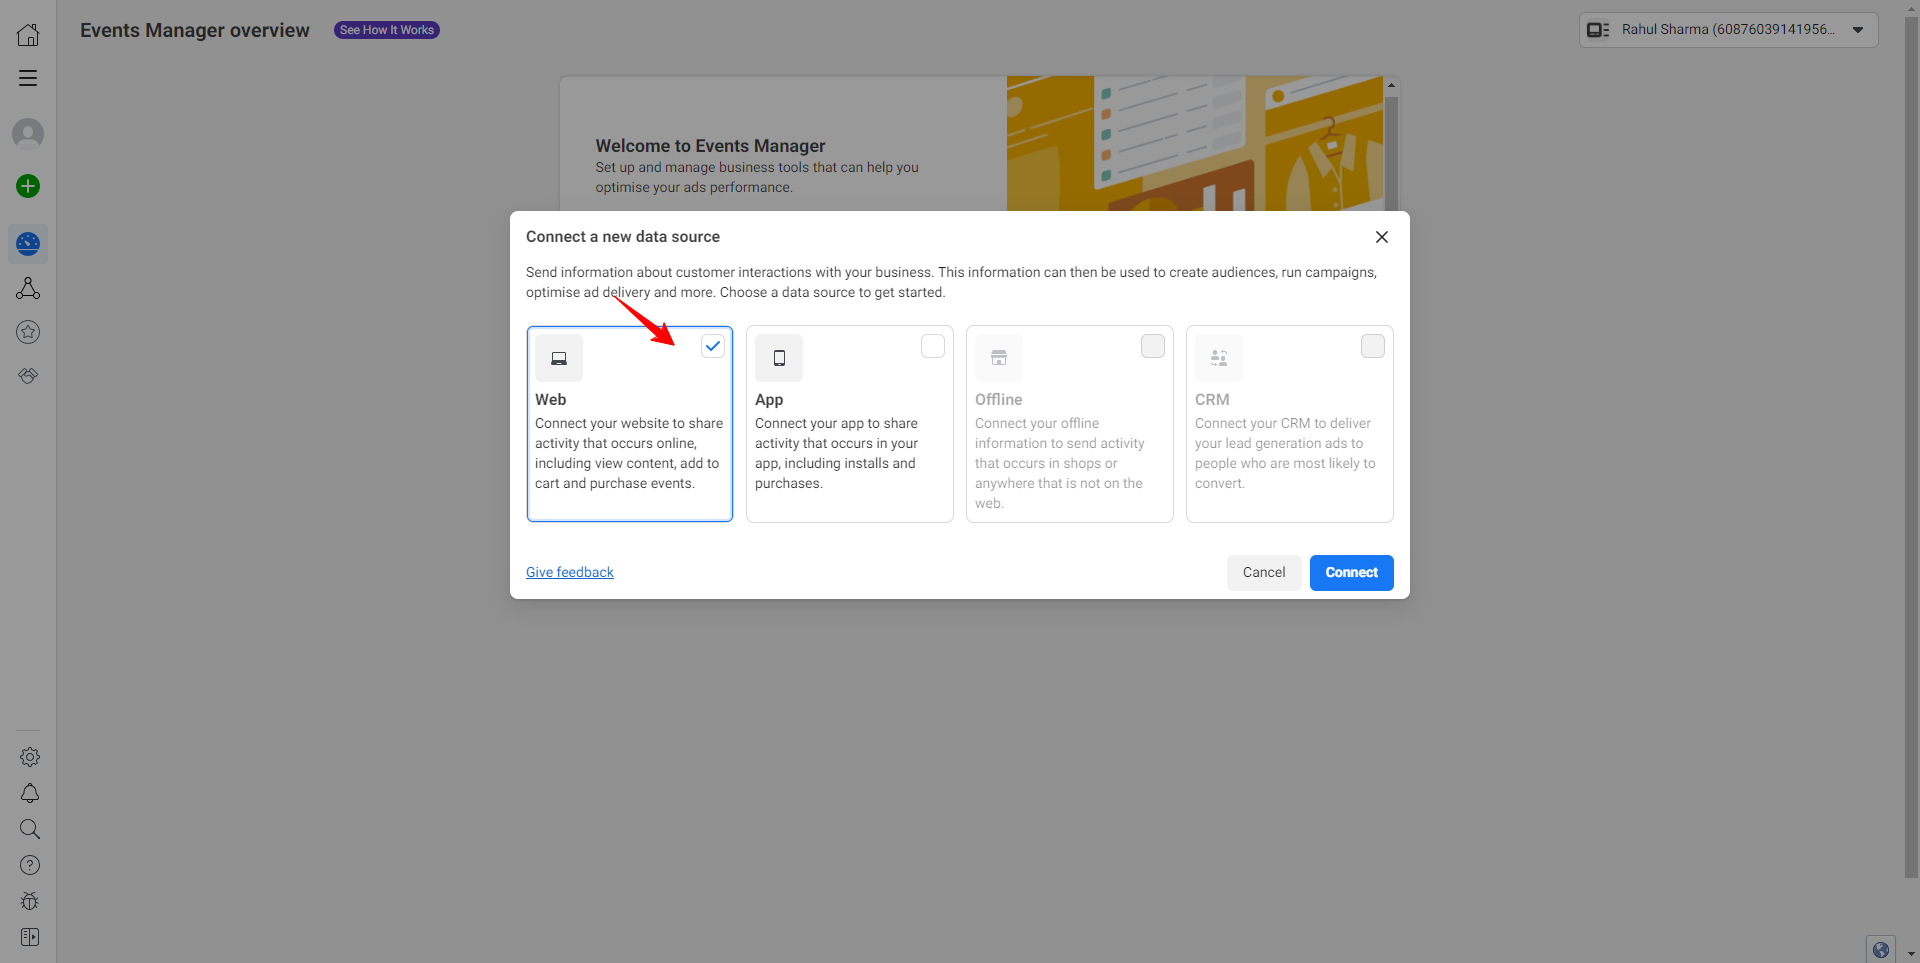
As a next step, A popup screen will emerge at this point and select the “Web” option since we intend to integrate it with our website.
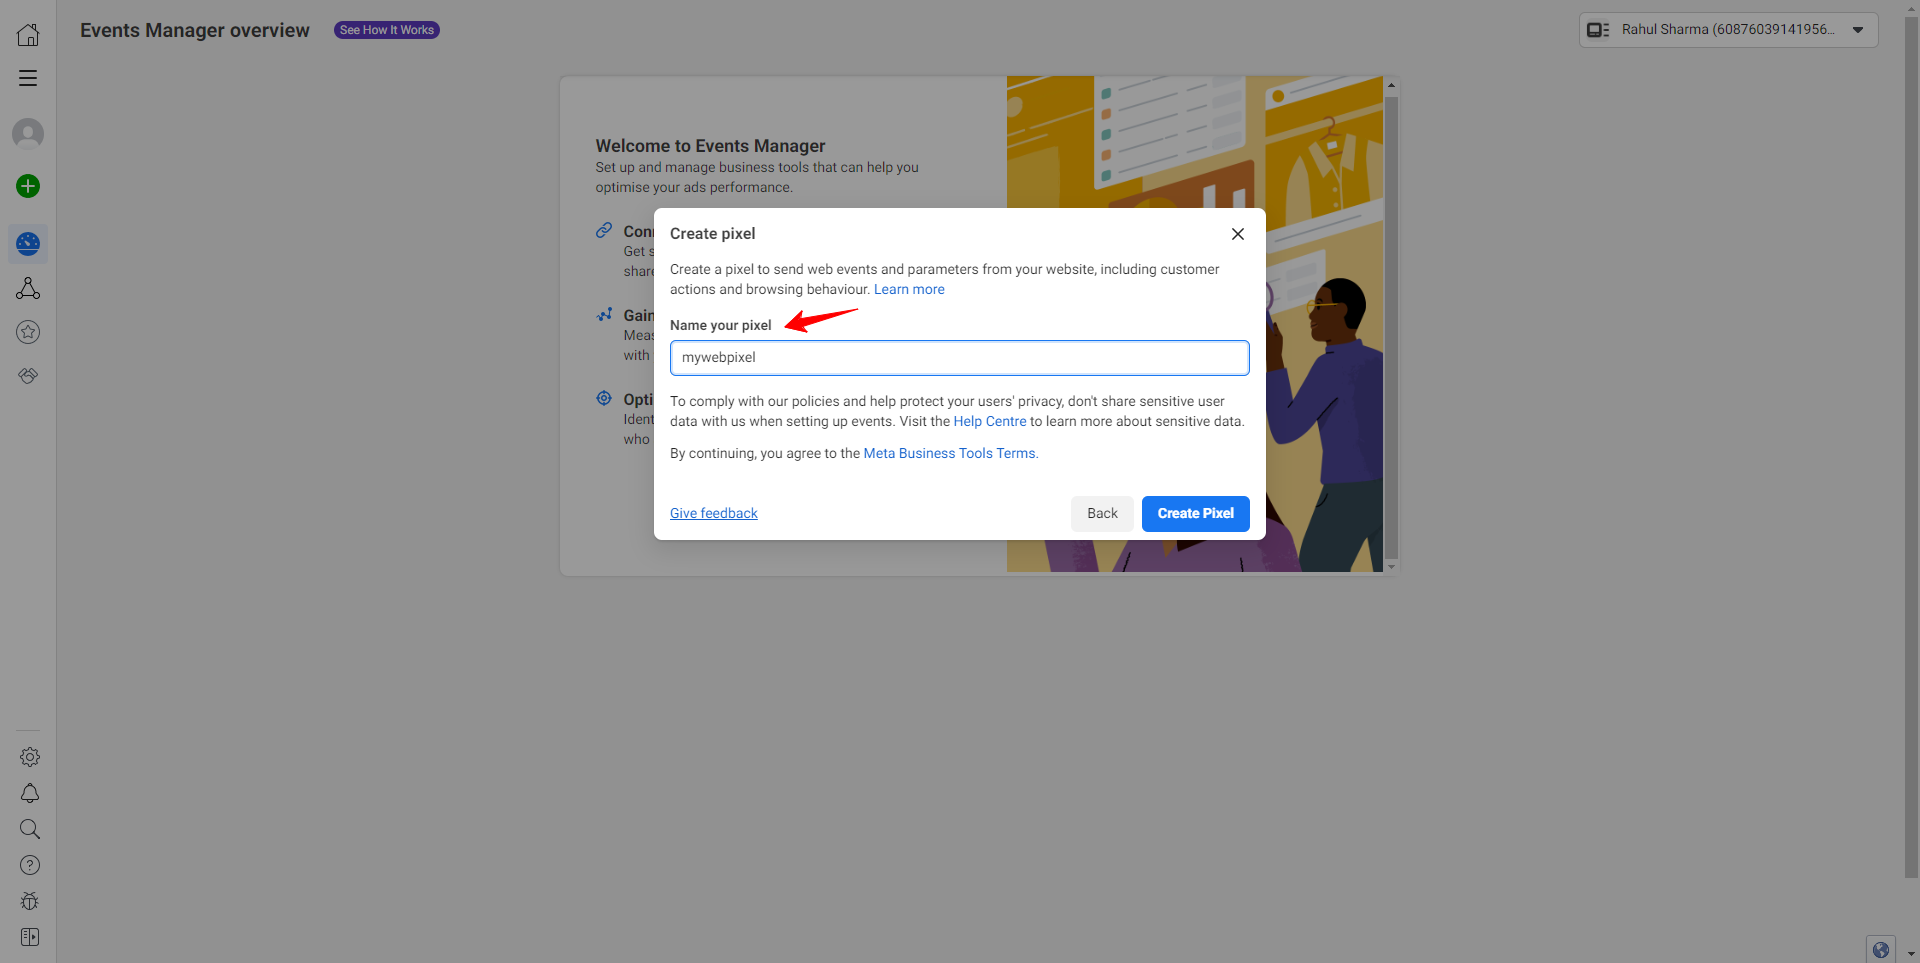
As a next step, provide the necessary details for your Facebook pixel, including its name, and then proceed to click on the “Create Pixel” button.
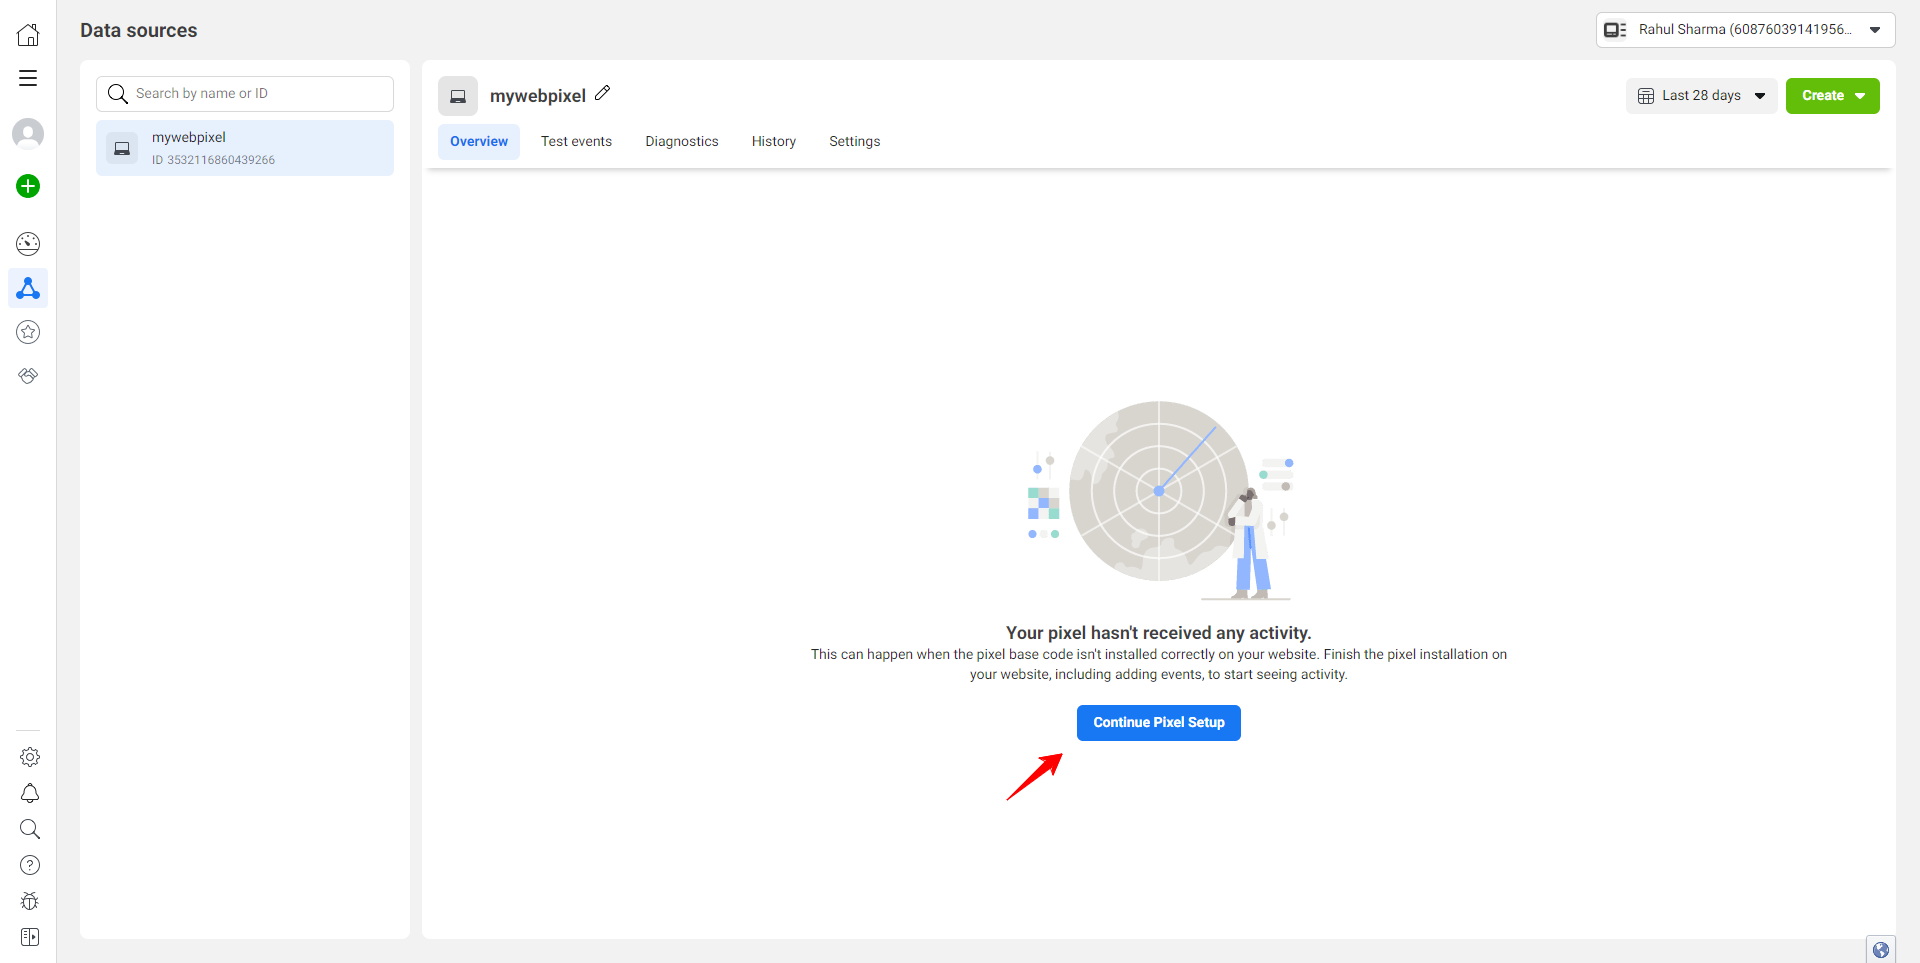
Once you’ve created the pixel name, navigate to the left sidebar and select the option to “Create Pixel Name,” then proceed to choose Complete Pixel Setup.
As a next step, next, opt for the “Install Code Manually” option.
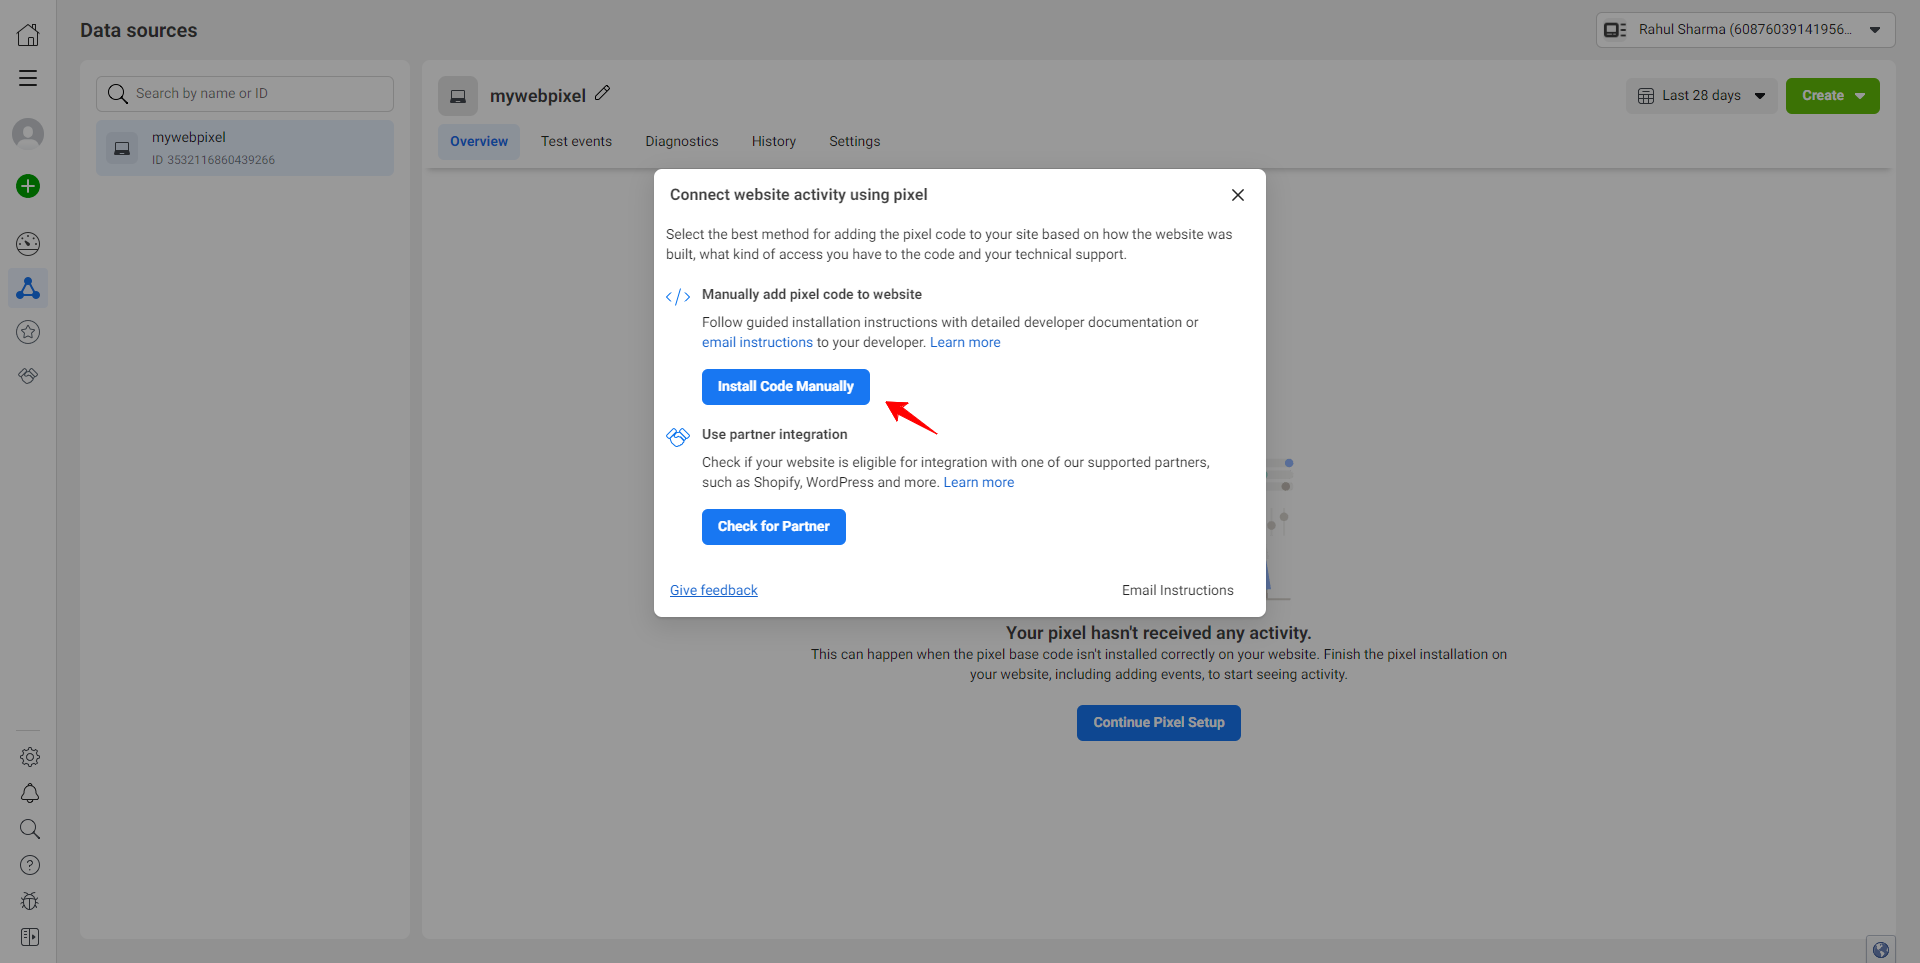
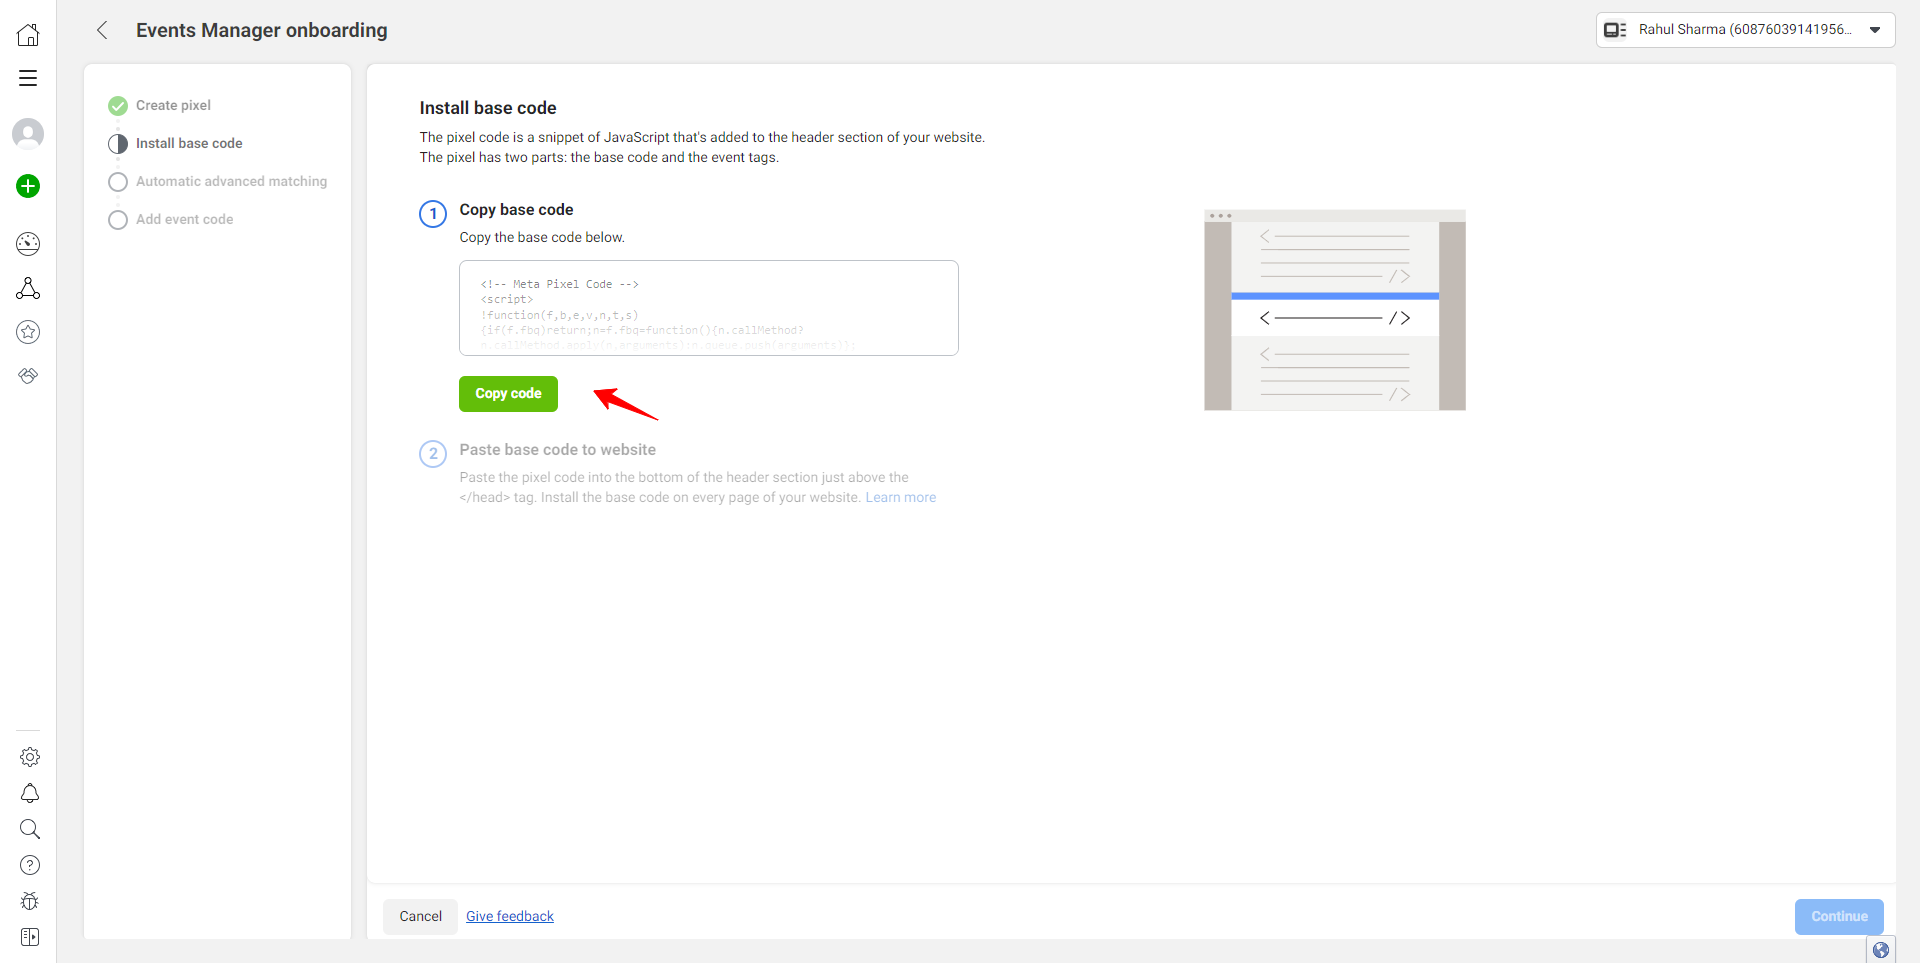
As a next step, the manual code will be displayed; select the “Copy Code” button to acquire the code, and then proceed by clicking on the “Continue” button.
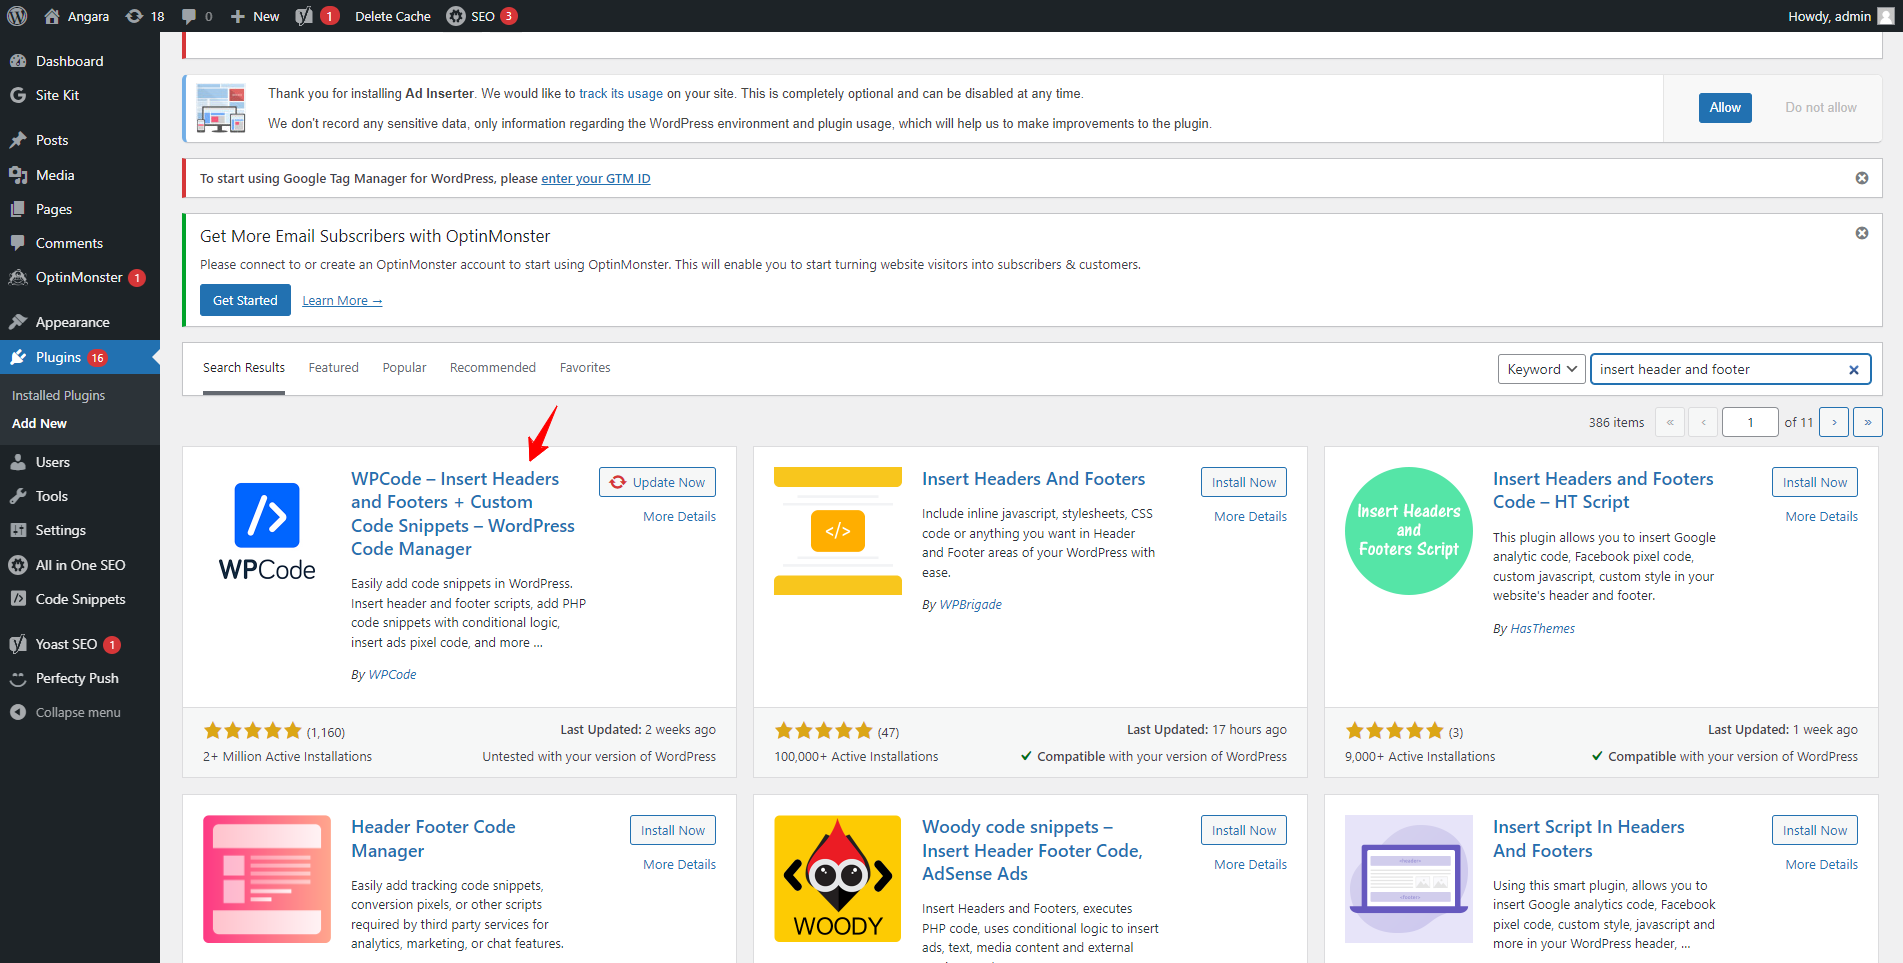
As a next step, once you’ve copied the code, navigate to your website’s dashboard and access the “Plugins” option.
As a next step, proceed to click on the “Add New Plugin” option.
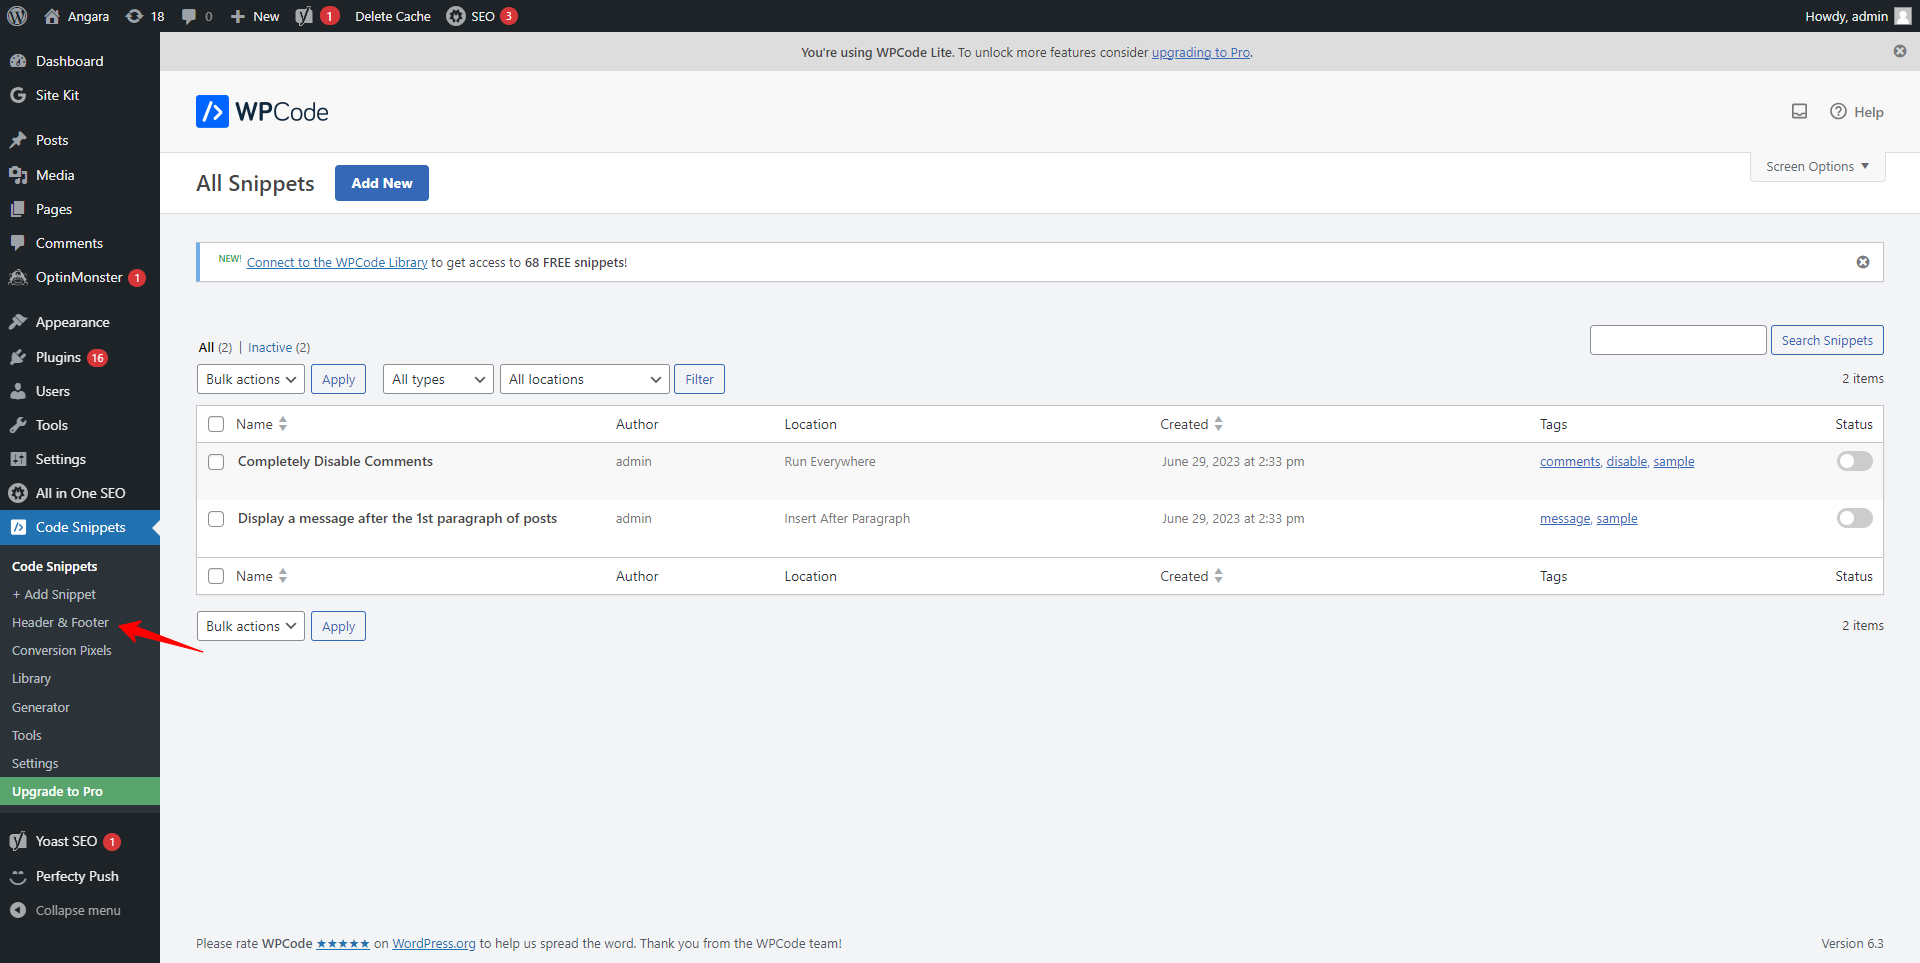
As a next step, In the search bar for adding new plugins, input the “Insert Header and Footer” plugin, then install and activate it.
Once the plugin is successfully installed, it will appear in the left sidebar panel under the name “Code Snippets”.
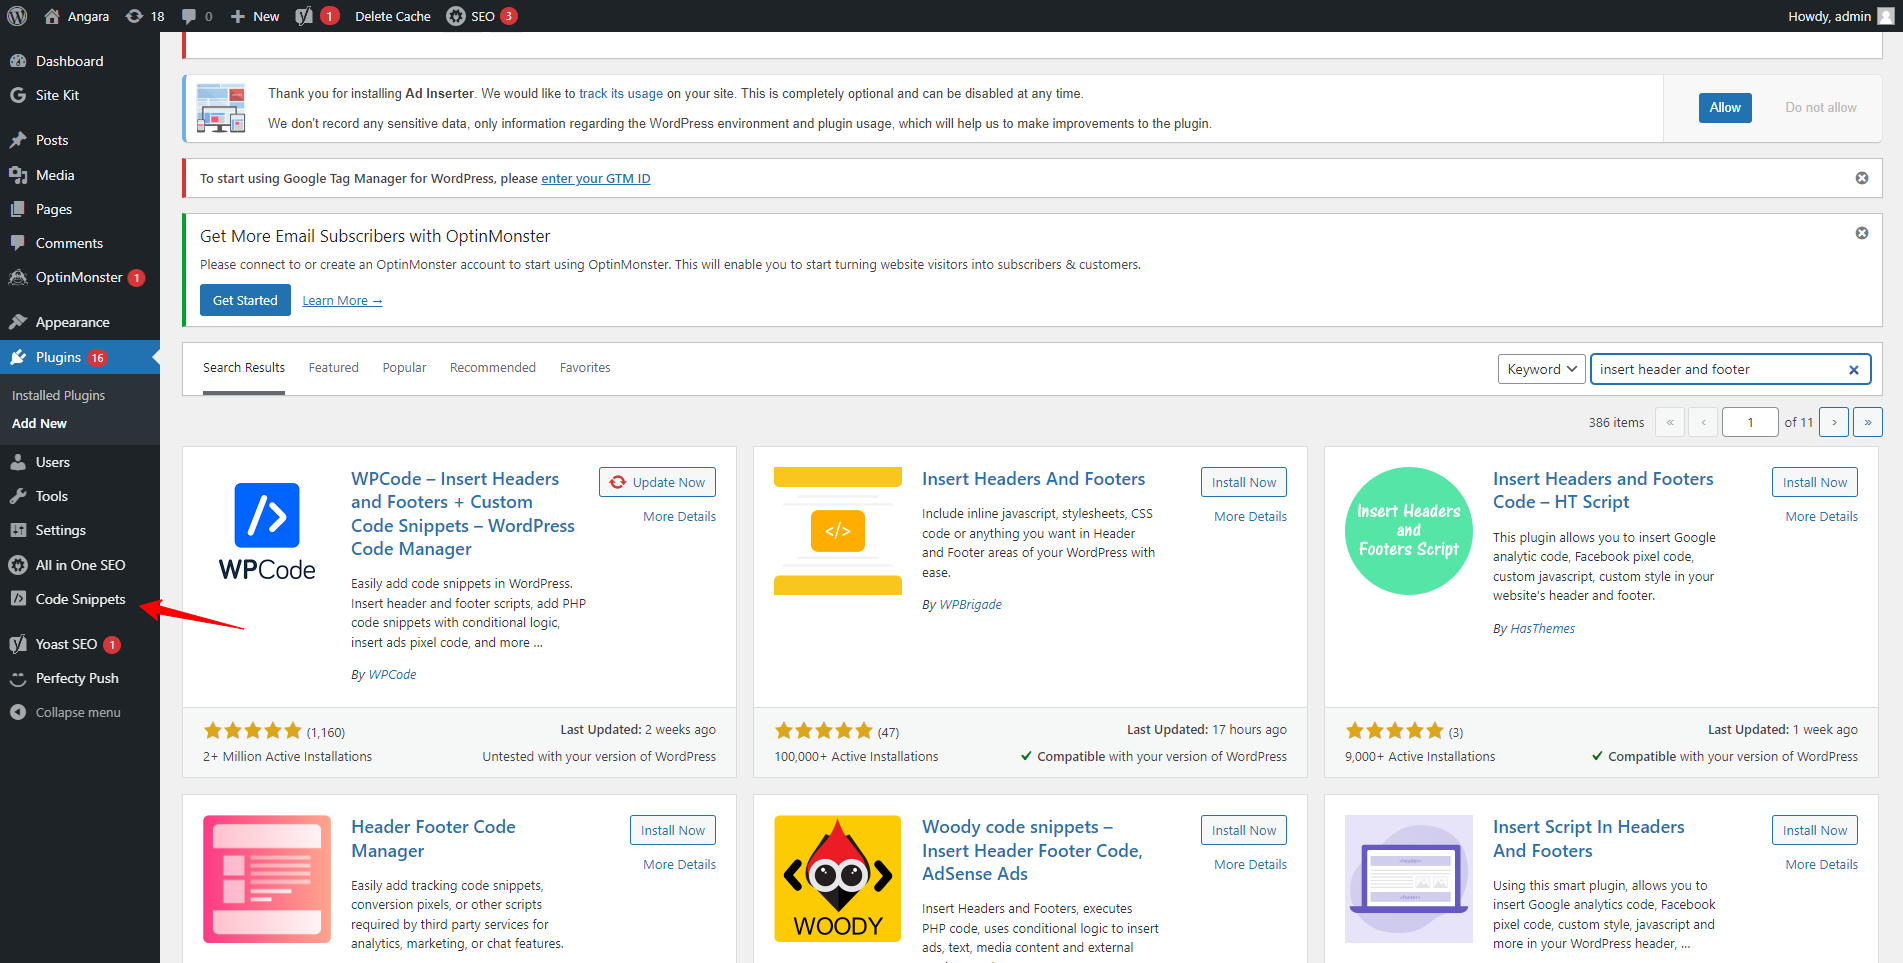
As a next step, now, select “Header and Footer” from the options within Code Snippets.
As the next step, proceed to insert the copied manual code into the header section here, and then save your changes.
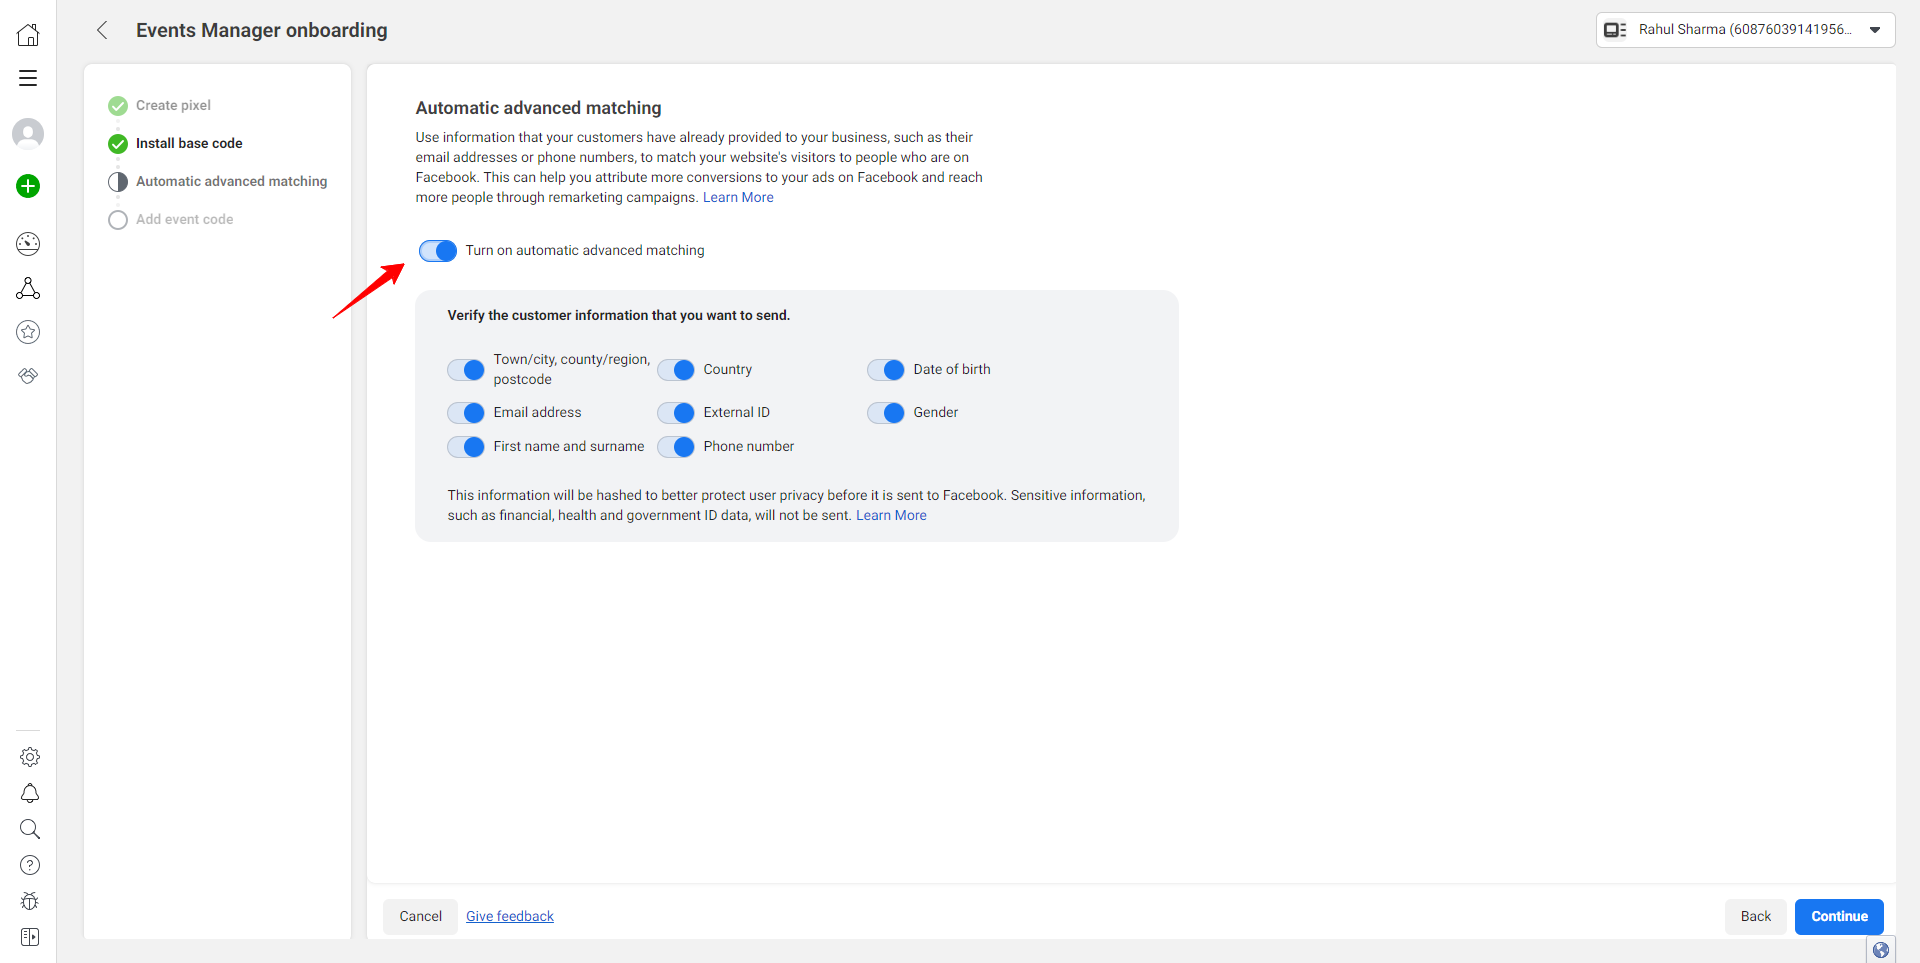
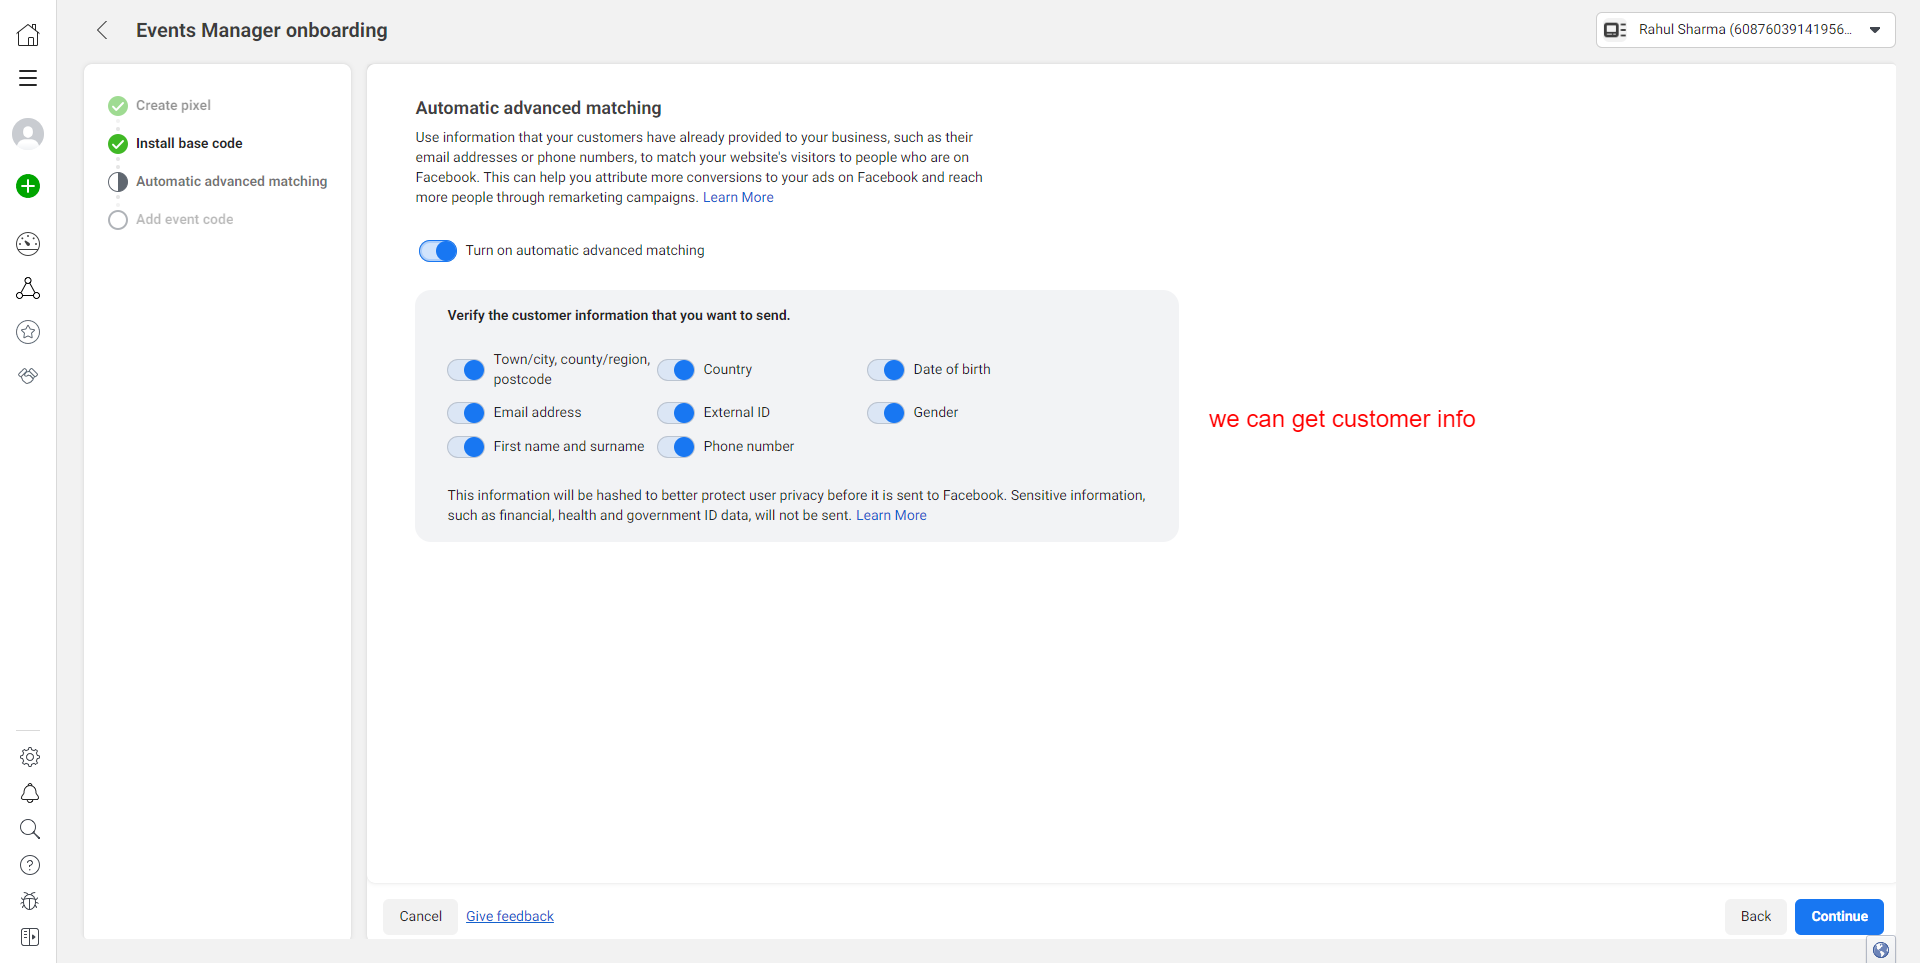
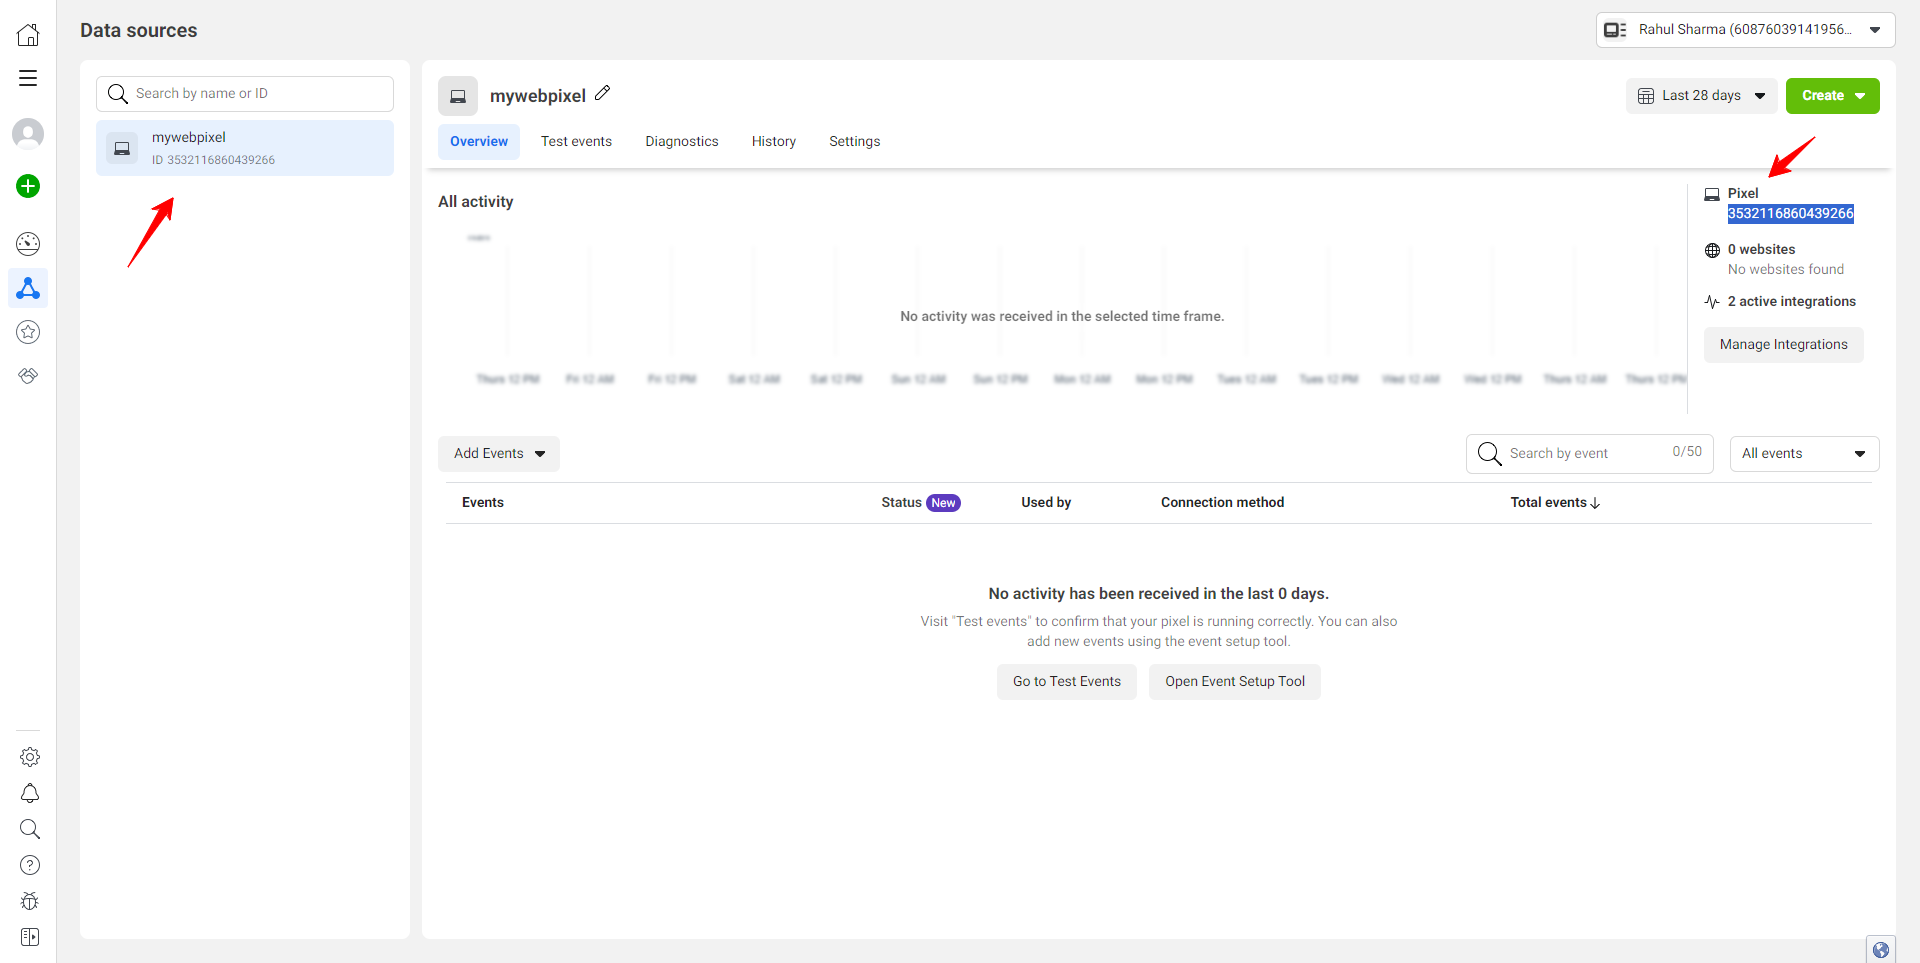
As the next step, subsequently, return to the Event Manager and activate the radio button to acquire the specific user information that is desired.
As the next step, following this, refresh the Event Manager tab entirely. Please note that it may take anywhere from 5 minutes to 1 hour for the pixel data to be successfully connected to your website.
As the next step, click on your pixel ID or pixel name, then select “Test Event” in order to assess the activity on your website.

Enter your website URL and click on “Open Website”; this action will launch your website in a new tab.
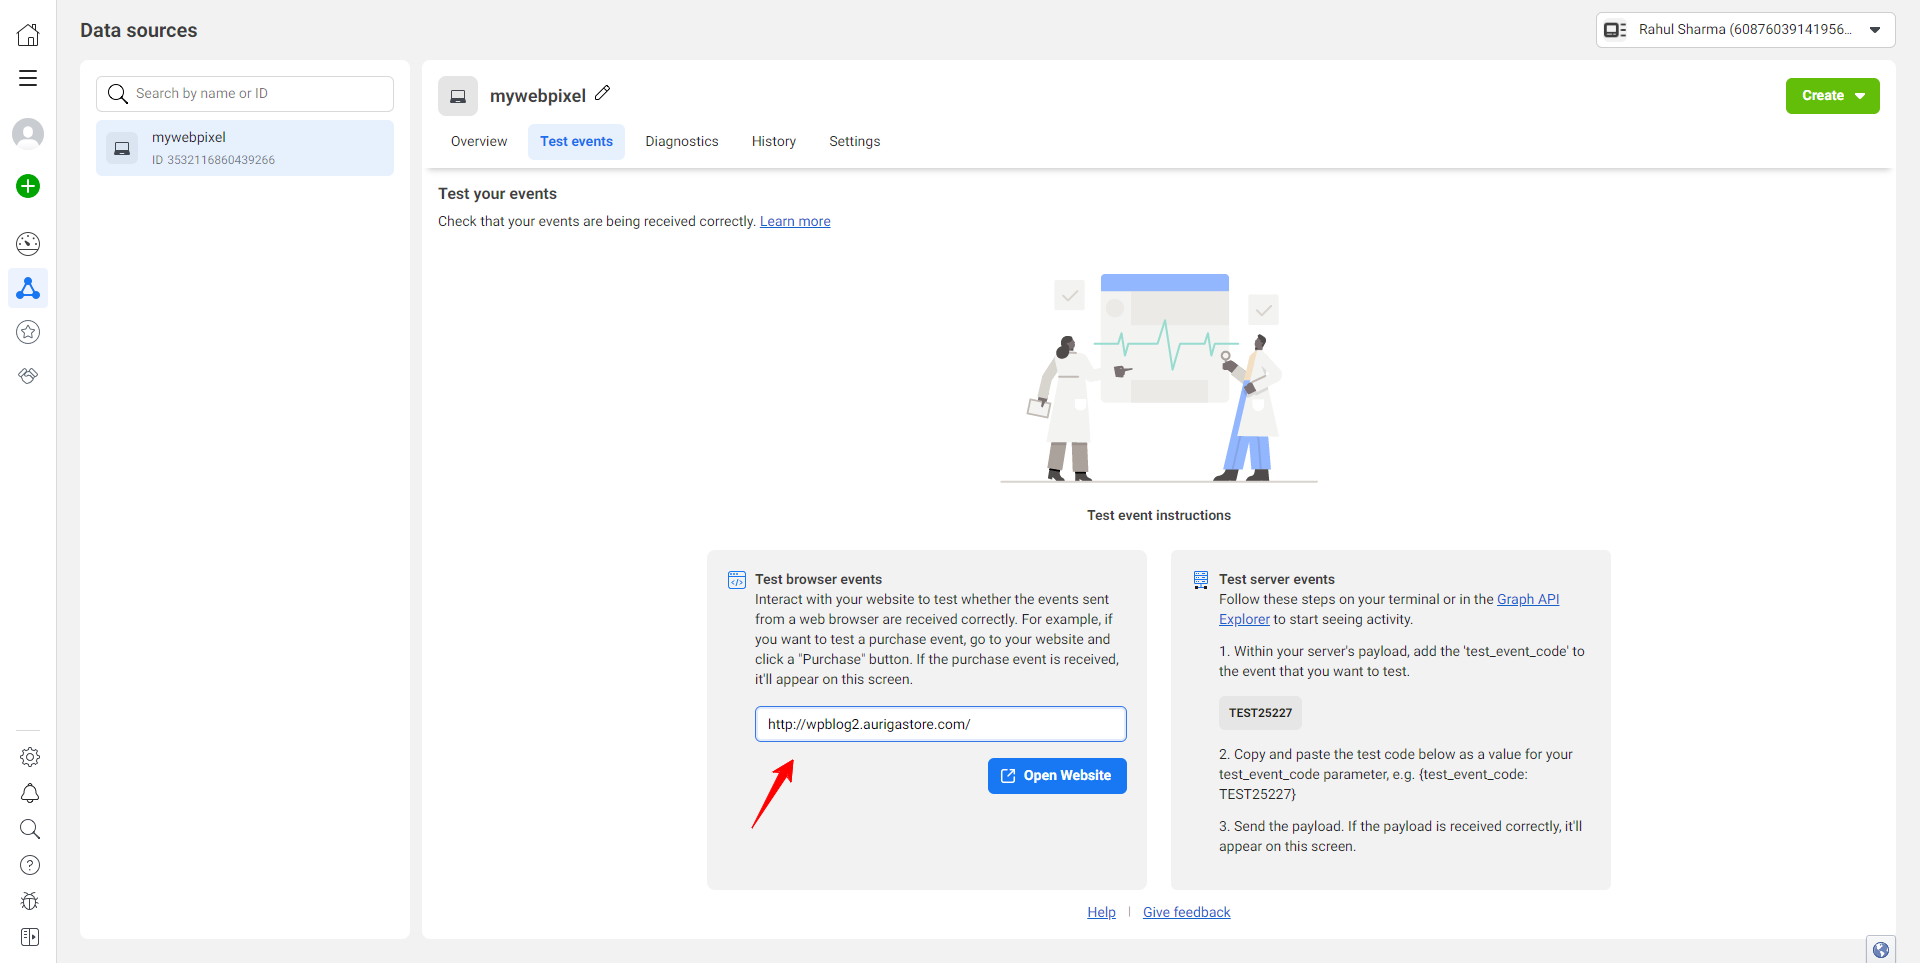
To verify the successful integration of the pixel with your website, return to the Event Manager dashboard and navigate to the Test Event screen; if the status reads “Processed,” it indicates that your pixel has been effectively integrated.
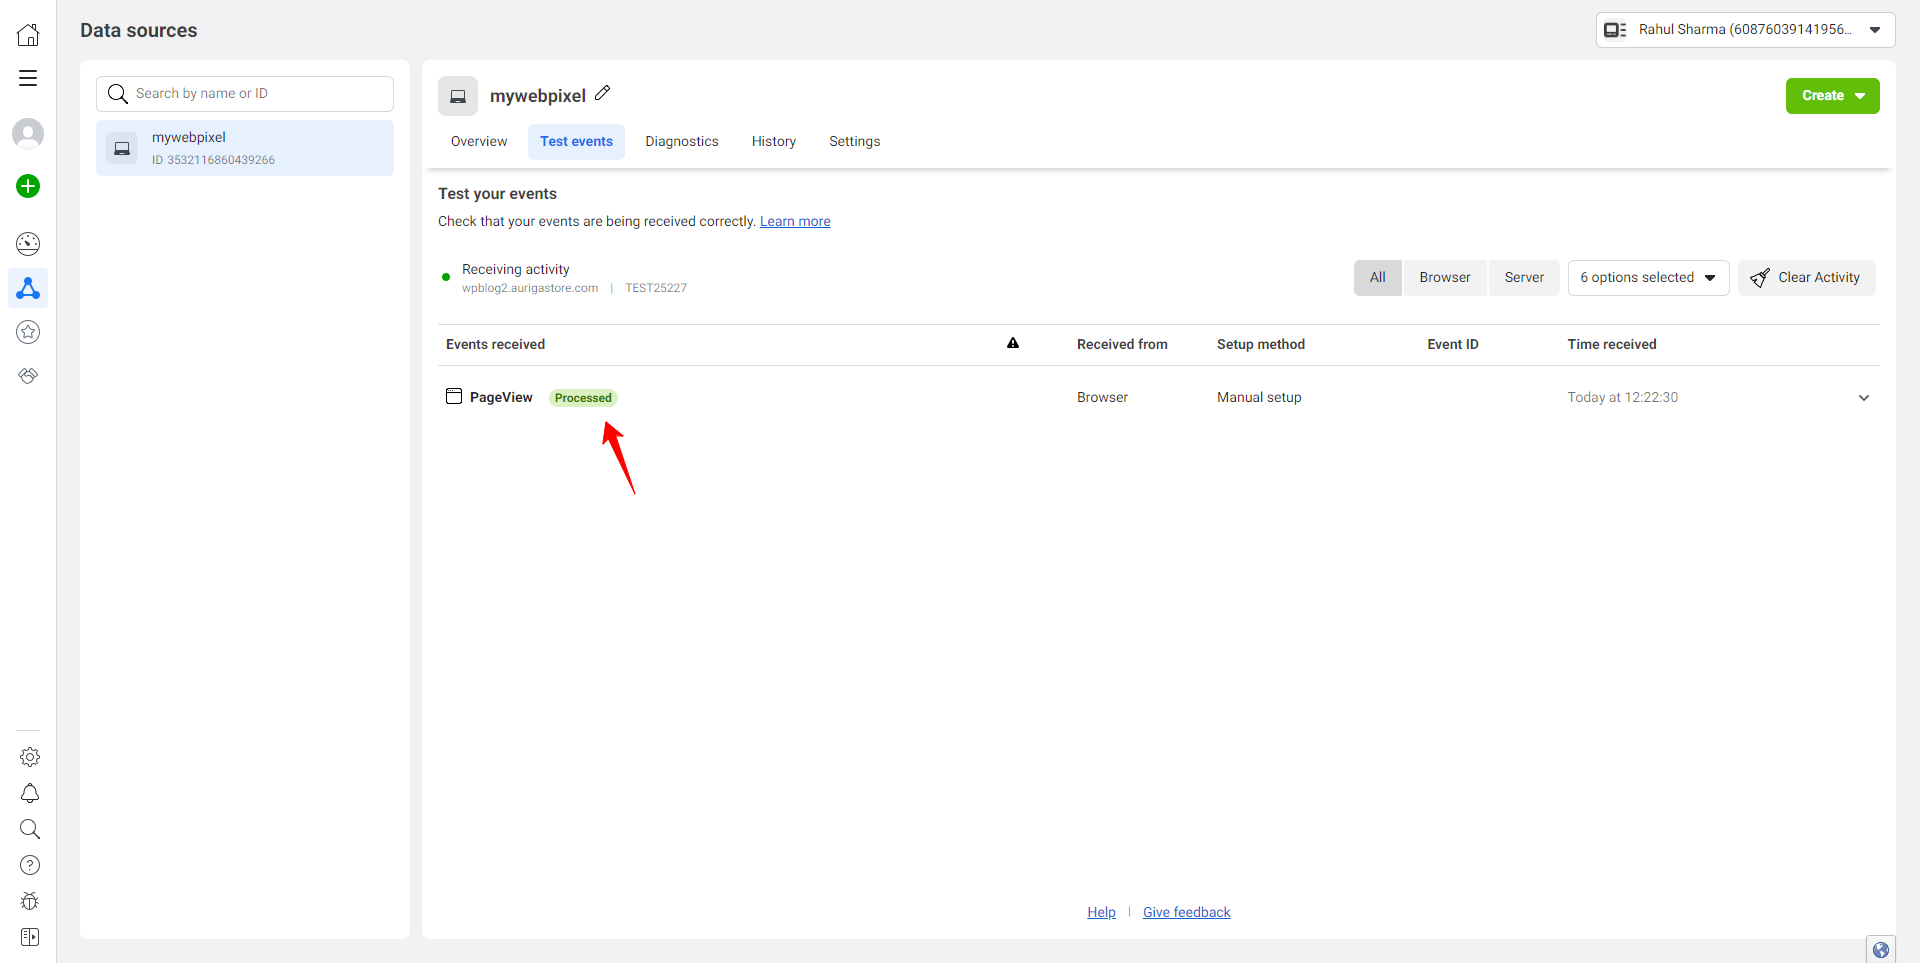
In case the “Processed” status is not displayed, it signifies that the setup process is incomplete and there might be errors during configuration. It’s important to address and clarify any issues that arise in these circumstances.
Following the integration, when users visit your website, their data will be displayed in your Facebook pixel dashboard.
2. Plugin Integration.
- As a new step, access your plugin settings.
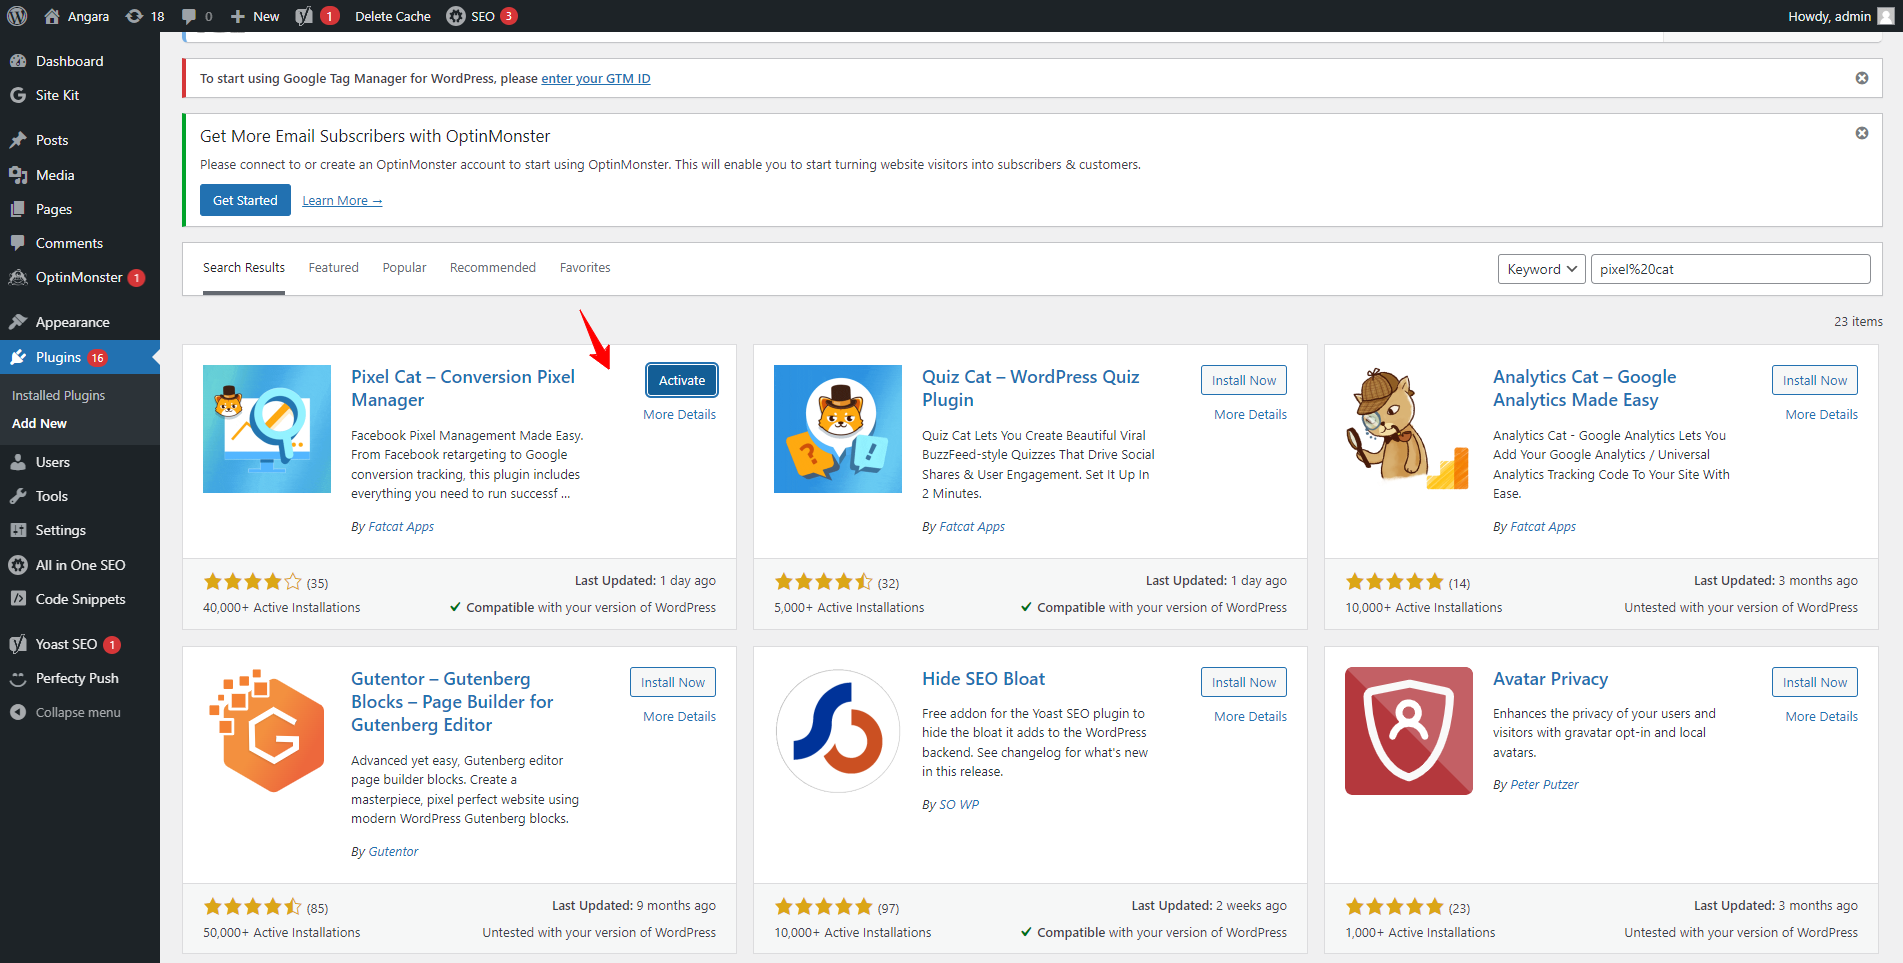
- Initiate the process of adding a new plugin.
- Search for the new plugin called “Pixel Cat”.
- Install and activate the plugin, after which you will find it listed in the left sidebar panel.
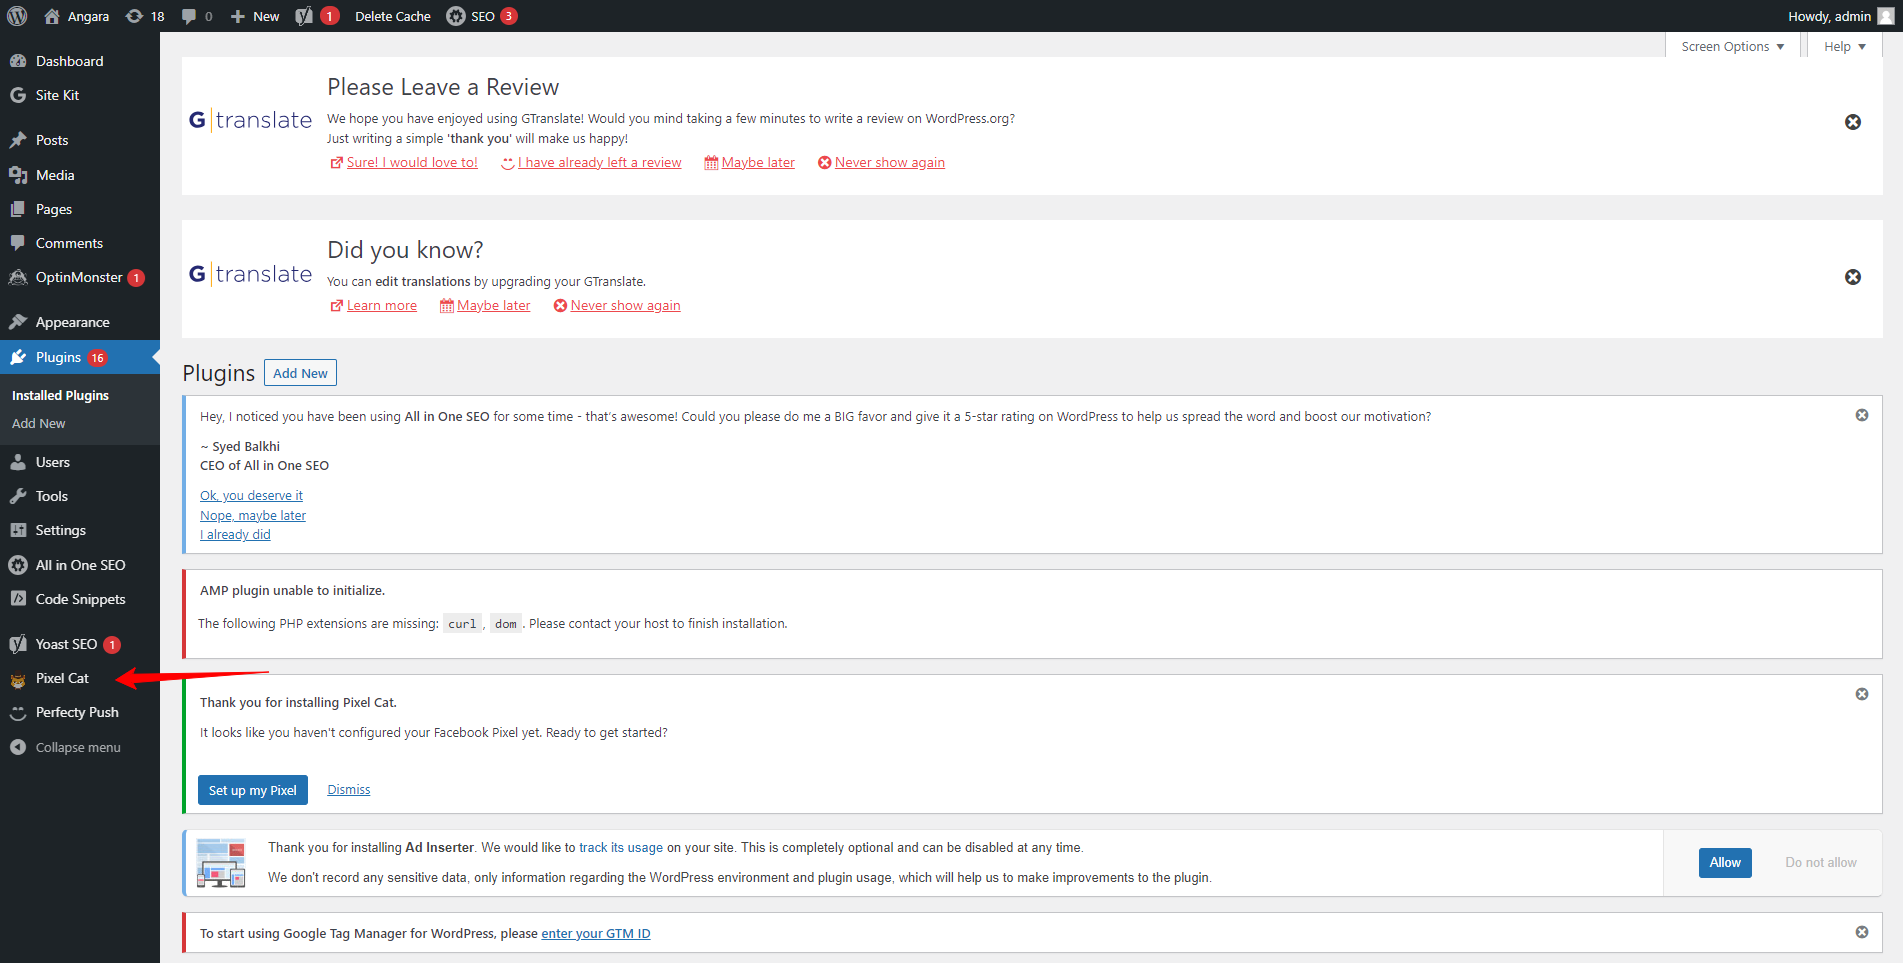
To configure the Pixel Cat plugin, click on the “Set Up My Pixel” option.
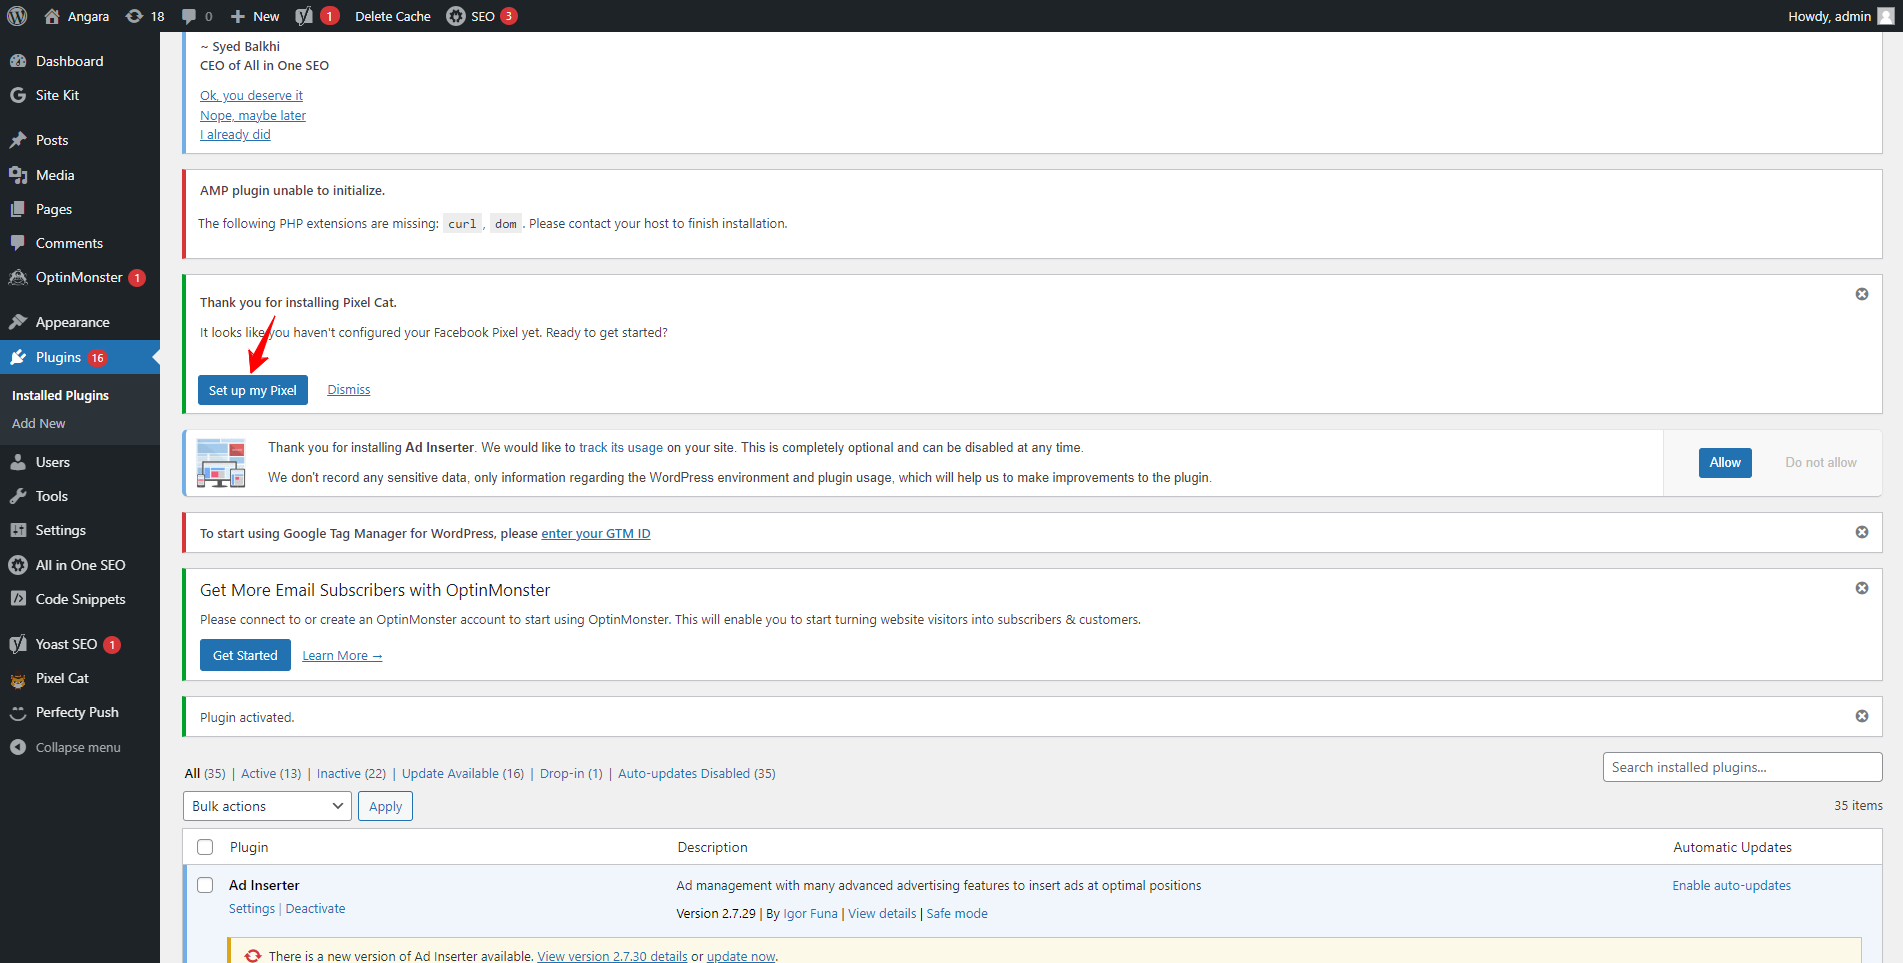
When prompted for your pixel ID, retrieve it from the Event Manager dashboard screen.
Choose or copy the ID from the Event Manager and paste it into the Pixel Cat setup screen where it’s requesting the ID. Then, save the changes.
![]()
subsequently, click on the “Save All Settings” button.
![]()
By utilizing the Pixel Cat plugin, we have successfully integrated and saved our pixel onto our website.
To confirm the successful completion of our pixel setup, we need to add a Chrome extension called “Meta Pixel Helper.” Install this extension in Chrome as an additional tool for verification.
![]()
Once the extension is added, enter your website’s URL in the Chrome browser.
While accessing the website URL, if the pixel is correctly set up, the extension’s color will transition to green, and your pixel ID will be displayed within the extension.
To verify the successful processing of the pixel, navigate to the Event Manager.
Access the “Test Event” tab, then input your website URL and click on “Open Website.”
If your website opens as expected, it indicates the successful integration of your pixel with the assistance of the plugin.
Conclusion –
In this blog, we have covered how to integrate Facebook Pixel into our WordPress website. We discussed the concept of Facebook Pixel and its significance, outlining two methods for implementation: manual integration and plugin-based integration. By incorporating Facebook Pixel, you gain the ability to measure, target, and optimize your Facebook ad campaigns effectively. With the simple addition of a single script to your WordPress site, Facebook Pixel offers valuable capabilities such as tracking conversion rates from your Facebook ad campaigns. This includes insights into metrics like the number of individuals who make purchases after clicking on a Facebook ad.”
Related content

Auriga: Leveling Up for Enterprise Growth!
Auriga’s journey began in 2010 crafting products for India’s [...]


