How to setup ejabberd on Ubuntu
- Digital Engineering
- General
How to setup ejabberd on Ubuntu
There are lot of ways to install ejabberd on Ubuntu like from operating system specific package, install it from source code etc. I will prefer to install it from source code so I am going to write steps for the same. Although initially it is little bit lengthy process but after this you will get latest version of ejabberd, sometimes we don’t get latest version when we install from os specific package also you will know how to compile ejabberd source code and if you have source code with knowledge of erlang you can customize it as well that will help you when you will install modules in Ejabberd. These steps are tested on Ubuntu 14.04 LTS (32 bit).
Please follow below steps one by one to install ejabberd on Ubuntu.
Step 1. Clone Ejabberd latest source code from github repository.
|
1 |
git clone git://github.com/processone/ejabberd.git ejabberd |
Step 2. Run below command to create configure script in root folder of ejabberd
|
1 |
./autogen.sh |
You may get following error while running above command:
|
1 2 |
./autogen.sh: line 2: aclocal: command not found ./autogen.sh: line 3: autoconf: command not found |
So if you get above error then run this command apt-get install automake then run ./autogen.sh
Step 3. Install Erlang to compile ejabberd source code if this is already not installed in your system. You can follow this url (https://www.erlang.org/downloads) to install Erlang.
Step 4. To compile ejabberd run the following command.
|
1 2 |
./configure make |
Step 5. To install ejabberd, run this command with system administrator rights (root user):
sudo make install
Step 6. Start Ejabberd with following command.
ejabberdctl start
Step 7. Create admin account from Ubuntu terminal and update admin account information in ejabberd.yml. Ejabberd don’t update this configuration file because this may override your custom changes. That’s why we have to do it manually.
|
1 |
ejabberdctl register <user_name> <host_name> <password> |
Step 8. Now go into /etc/ejabberd/ejabberd.yml file and find ACCESS CONTROL LISTS section, in this section change acl configuration like below.
|
1 2 3 |
admin: user: - "admin": "localhost" |

In above user section admin is the user name of admin account and localhost is host name.
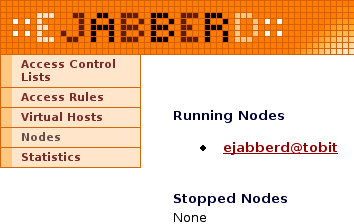
Step 9: Access ejabberd admin panel using http://example.com:5280/admin. It will ask you for user name and password. Enter user name and password of admin created by you in step 7.
Keep visiting us for more blogs on XMPP and Ejabberd.
Feel free to comment if you face any difficulty in installing ejabberd, we will be happy to
help you on this.
Happy Coding !!
Related content
Auriga: Leveling Up for Enterprise Growth!
Auriga’s journey began in 2010 crafting products for India’s
