Jenkins – Installing and setting up continuous integration tool
- Digital Engineering
- General
- Quality Engineering
Jenkins – Installing and setting up continuous integration tool
What is Jenkins?
Jenkins is a powerful application that allows continuous integration and continuous delivery of projects, regardless of the platform you are working on. It is a free source that can handle any kind of build or continuous integration. You can integrate Jenkins with a number of testing and deployment technologies.
Features of Jenkins-
Jenkins offers the following major features out of the box, and many more can be added through plugins –
- Easy installation: Just run java -jar jenkins.war, deploy it in a servlet container. No additional install, no database. Prefer an installer or native package? We have those as well.
- Easy configuration: Jenkins can be configured entirely from its friendly web GUI with extensive on-the-fly error checks and inline help.
- Rich plugin ecosystem: Jenkins integrates with virtually every SCM or build tool that exists.
- Extensibility: Most parts of Jenkins can be extended and modified, and it’s easy to create new Jenkins plugins. This allows you to customize Jenkins to your needs.
- Distributed builds: Jenkins can distribute build/test loads to multiple computers with different operating systems. Building software for OS X, Linux, and Windows? No problem.
Installing Jenkins on Ubuntu –
|
1 2 3 4 |
$ wget -q -O - https://pkg.jenkins.io/debian/jenkins-ci.org.key | sudo apt-key add - $ sudo sh -c 'echo deb http://pkg.jenkins.io/debian-stable binary/ > /etc/apt/sources.list.d/jenkins.list' $ sudo apt-get update $ sudo apt-get install jenkins |
What does this package do?
- Jenkins will be launched as a daemon up on start. See /etc/init.d/jenkins for more details.
- The ‘jenkins’ user is created to run this service.
- Log file will be placed in /var/log/jenkins/jenkins.log. Check this file if you are troubleshooting Jenkins.
- By default, Jenkins listen on port 8080. Access this port with your browser to start configuration.
- If your /etc/init.d/jenkins file fails to start jenkins on port 8080, edit the /etc/default/jenkins to replace the line –
by1HTTP_PORT=80801HTTP_PORT=<any_free_port_number>
Setting up Apache Proxy for port 80 to 8080 –
This configuration will setup Apache2 to proxy port 80 to 8080 so that you can keep Jenkins on 8080.
|
1 2 3 |
$ sudo apt-get install apache2 $ sudo a2enmod proxy $ sudo a2enmod proxy_http |
The following steps should only be done if you do not want the default site to stay in place. All the steps described above should work without this step in a normal virtual hosted environment on a Debian/Ubuntu installation –
|
1 |
$ sudo a2dissite default |
If you get ERROR: Site default does not exist! then try this instead:
|
1 |
$ sudo a2dissite 000-default |
And if all else fails just have a look if there is a default site set up at all:
|
1 |
$ ls /etc/apache2/sites-enabled/ |
Create a file called jenkins.conf in /etc/apache2/sites-available –
|
1 2 3 4 5 6 7 8 9 10 11 12 13 |
<VirtualHost *:80> ServerAdmin webmaster@localhost ServerName ci.company.com ServerAlias ci ProxyRequests Off <Proxy *> Order deny,allow Allow from all </Proxy> ProxyPreserveHost on ProxyPass / http://localhost:8080/ nocanon AllowEncodedSlashes NoDecode </VirtualHost> |
And finally execute below commands –
|
1 2 |
$ sudo a2ensite jenkins $ sudo apache2ctl restart |
Accessing Jenkins –
To see Jenkins, simply bring up a web browser and go to URL http://myServer:8080 where myServer is the name of the system running Jenkins.
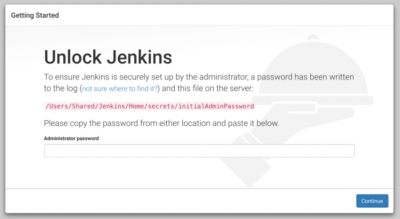
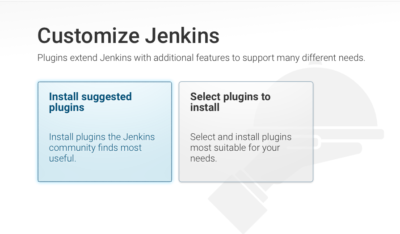
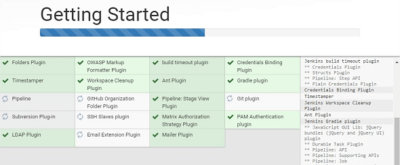
For first time, it will ask to set credentials of jenkins user from a file after that you have to login by entering jenkins user. After that it will ask to install some suggested plugins or other plugins, installation of the suggested plugins makes a lot of sense as otherwise some really basic features are missing –
The following screenshot gives an idea on what is installed here –
Now you can configure Jenkins and can start building projects.
You can find more help here – https://wiki.jenkins-ci.org/display/JENKINS/Installing+Jenkins+on+Ubuntu
Related content
Auriga: Leveling Up for Enterprise Growth!
Auriga’s journey began in 2010 crafting products for India’s


