Unit testing with code coverage using JUnit
- General
Unit testing with code coverage using JUnit
INTRODUCTION
In this article, we will understand what is unit testing, why it is required and how to perform unit testing with code coverage using JUnit in spring boot.
WHAT IS UNIT TESTING?
A unit test, to put it simply, is a piece of code created by a developer to test a specific aspect of code functionality. This testing method is also the first level of software testing, which is performed before other testing methods such as integration testing.
This testing is done during the development process by the software developers. The main objective of unit testing is to isolate written code to test and determine if it works as intended, in this developers test the correctness of a particular component.
WHY UNIT TESTING IS REQUIRED?
One of the benefits of unit test is that it isolates a function, class, or method and only tests that piece of code, resulting in high-quality individual components. Overall system resilience is produced by high-quality individual components and the result is a reliable code.
If unit tests are written properly then –
1. Decrease defects and expose them early in the development life-cycle.
2. Increase code readability.
3. Increase code re-usability.
4. Improve deployment velocity.
JUnit
JUnit is an open-source testing framework, it is widely used by Java developers to write and execute tests. All the test cases have to be re-executed every time a new code is added in order to ensure that nothing is broken.
Annotations
These are some of the annotations that we will need for unit testing.
1. @SpringBootTest: It is used to define the test class.
2. @BeforeAll: This block of code will execute on the startup of the test class.
3. @BeforeEach: This block of code will execute before every test case.
4. @AfterAll: This block of code will execute after all test cases execution is completed.
5. @AfterEach: This block of code will execute after every test case.
6. @Test: It is used to define individual Test functions.
7. @DisplayName: This annotation is used with the test method to display its name in the runtime environment.
8. @MockBean: It is used to mock the methods which are needed to support the testing.
9. @TestMethodOrder: It is a type-level annotation that is used to configure a MethodOrderer for the test methods of the annotated test class or test interface.
10. @Order: It is used for Advice execution precedence. It sets the order in which functions are executed.
Example
Create a spring application
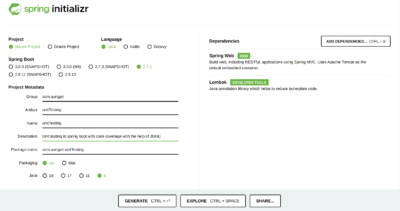
Create a spring application from start.spring.io and open it in any IDE.
You can follow this folder structure for this example –
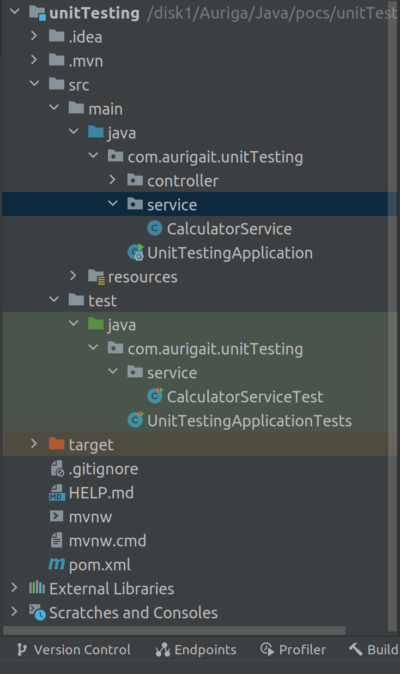
Now, create CalculatorService class, which will be tested in this example.
|
1 2 3 4 5 6 7 8 9 10 11 12 13 |
@Service public class CalculatorService { public Double divide(Double numerator, Double denominator) { try { if(denominator == 0){ throw new Exception("Denominator can not be zero"); } return numerator / denominator; } catch (Exception e) { throw new RuntimeException(e); } } } |
Create a Test class
Now, create CalculatorServiceTest class, which is our test class. In this class, we will write our unit test cases. Test cases should be written such that all possible inputs and scenarios are tested.
Like in this example we have tested the divide method will all possible combinations of inputs, you can also add some more test cases for this method.
|
1 2 3 4 5 6 7 8 9 10 11 12 13 14 15 16 17 18 19 20 21 22 23 24 25 26 27 28 29 30 31 32 33 34 35 36 37 38 39 40 41 42 43 44 45 46 |
@SpringBootTest @TestMethodOrder(MethodOrderer.OrderAnnotation.class) public class CalculatorServiceTest { @Autowired private CalculatorService calculatorService; @Test @Order(1) @DisplayName("Testing Divide: When both arguments are positive") void test_Divide_When_Both_Arguments_Are_Positive_Integer() { Double numerator = 4.0; Double denominator = 2.0; Double result = calculatorService.divide(numerator, denominator); assertEquals(2.0, result); } @Test @Order(2) @DisplayName("Testing Divide: When numerator is positive and denominator is negative") void test_Divide_When_Numerator_Is_Positive_And_Denominator_Is_Negative() { Double numerator = 4.0; Double denominator = -2.0; Double result = calculatorService.divide(numerator, denominator); assertEquals(-2.0, result); } @Test @Order(3) @DisplayName("Testing Divide: When numerator is negative and denominator is positive") void test_Divide_When_Numerator_Is_Negative_And_Denominator_Is_Positive() { Double numerator = -4.0; Double denominator = 2.0; Double result = calculatorService.divide(numerator, denominator); assertEquals(-2.0, result); } @Test @Order(4) @DisplayName("Testing Divide: When both arguments are negative") void test_Divide_When_Both_Arguments_Are_Negative_Integer() { Double numerator = -4.0; Double denominator = -2.0; Double result = calculatorService.divide(numerator, denominator); assertEquals(2.0, result); } } |
To execute these test cases with the coverage report click on the run test icon near the class name. From the opened menu click on Run ‘CalculatorServiceTest’ with Coverage.
You can also execute your test case using the command mvn test -Dtest=CalculatorServiceTest
Testing with coverage
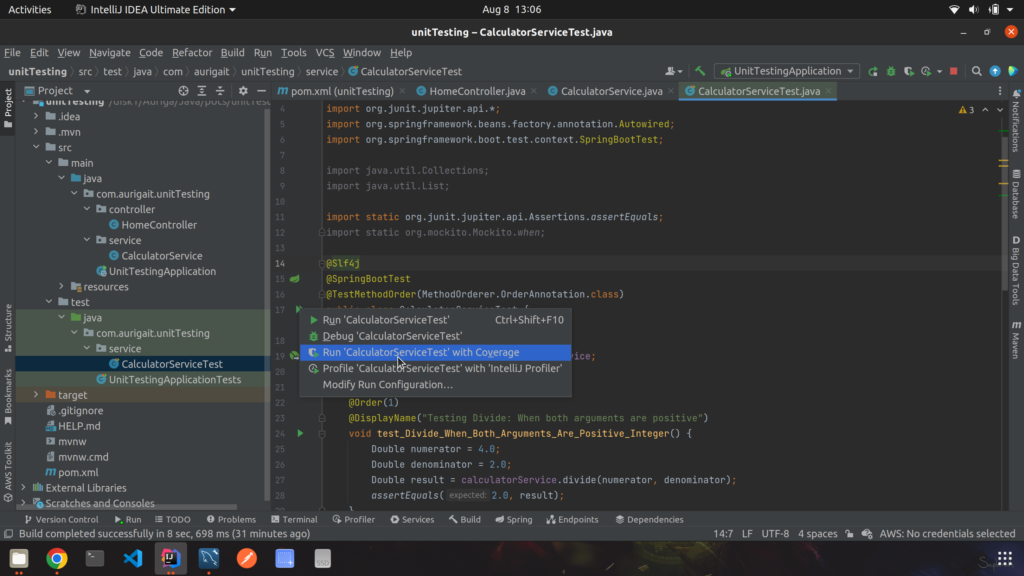
Now, test cases will start executing and all tests will be passed successfully.

Now, let’s check the coverage report of CalculatorService.
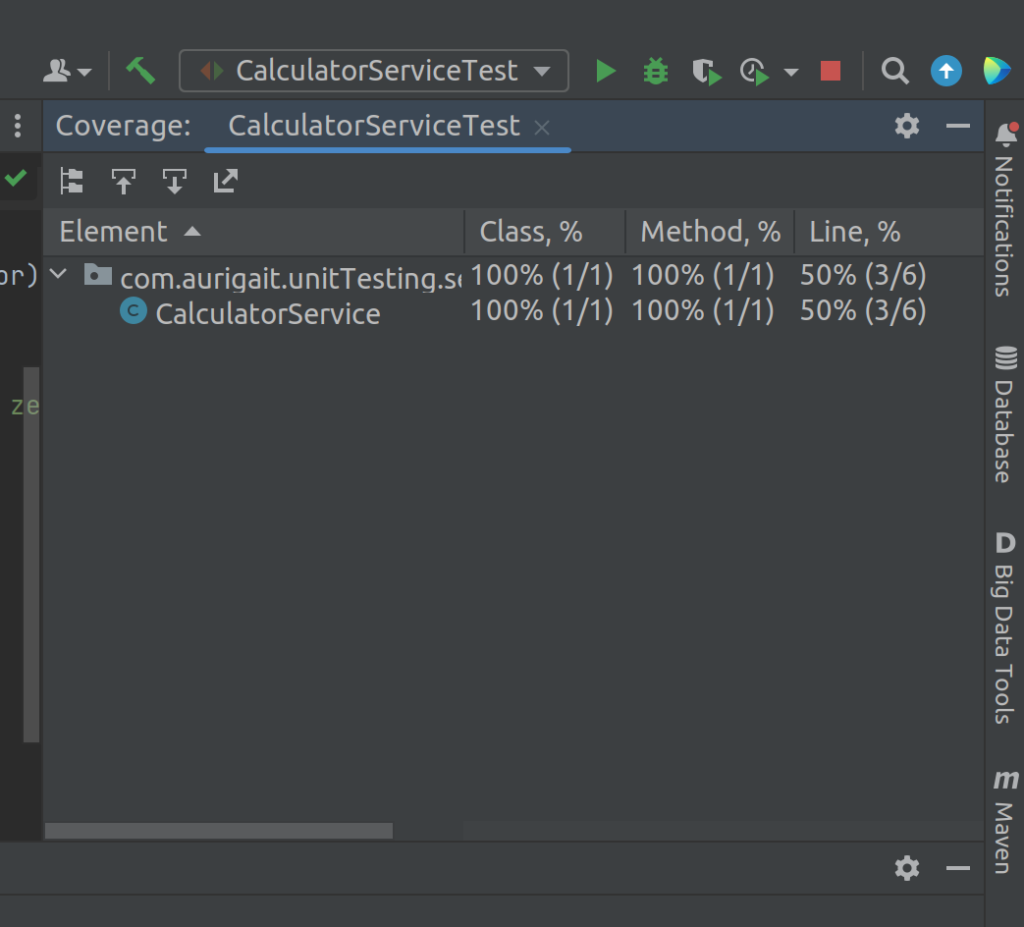
Here, you can check the coverage of class, methods, and lines. And for line coverage is 50%. Now, to check which lines are not covered, open CalculatorService class.
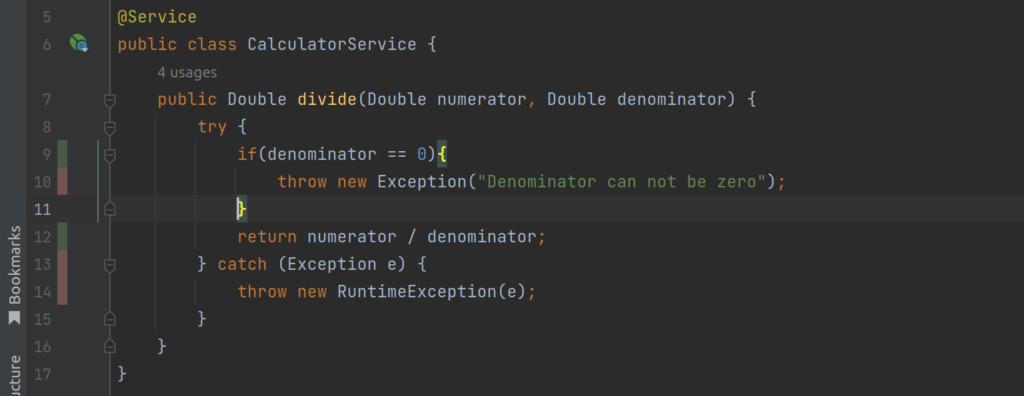
In this picture, Green strips indicate that these lines are coved in test cases and red strips indicate that these lines are not coved in test cases. Here Exception case where the denominator is zero is not covered in the test case.
Let’s add a new test in CalculatorServiceTest.
|
1 2 3 4 5 6 7 8 9 10 11 |
@Test @Order(5) @DisplayName("Testing Divide: When denominator is zero") void test_Divide_When_Denominator_Is_Zero() { Double numerator = 4.0; Double denominator = 0.0; Exception thrown = Assertions.assertThrows(Exception.class, () -> { calculatorService.divide(numerator, denominator); }); assertEquals("java.lang.Exception: Denominator can not be zero",thrown.getMessage()); } |
Now rerun all test cases with coverage, now the test case report will show 100% coverage for class, method, and lines.
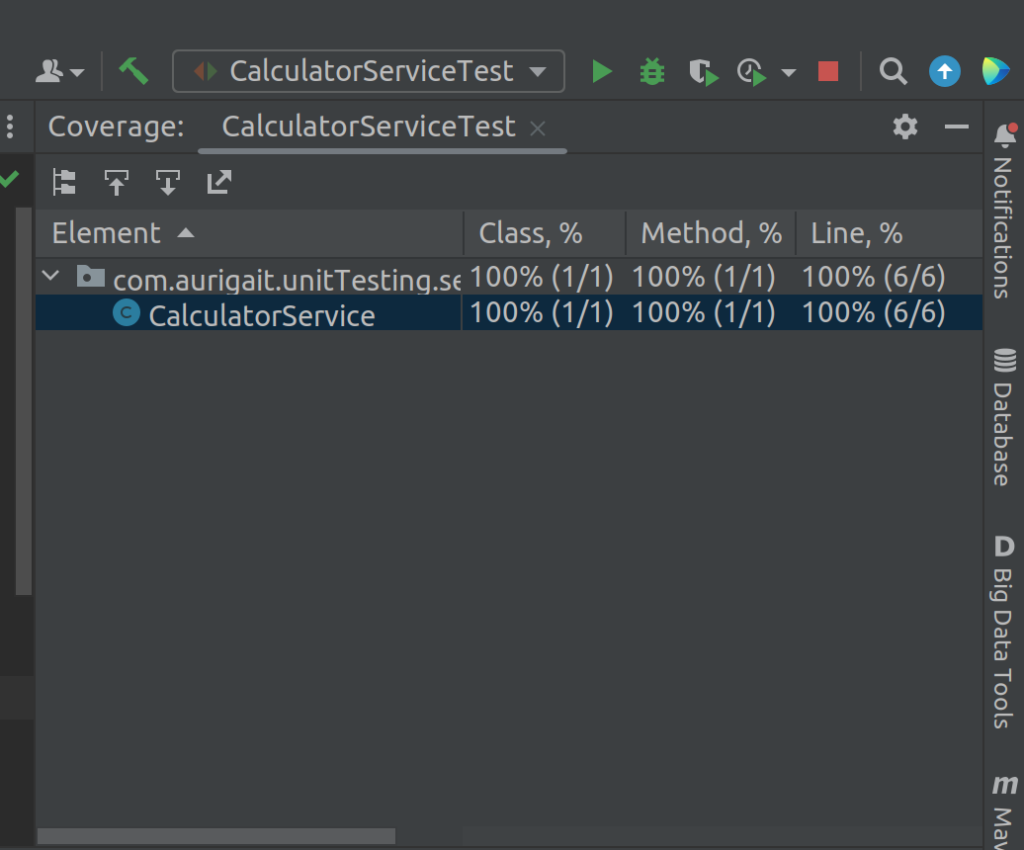
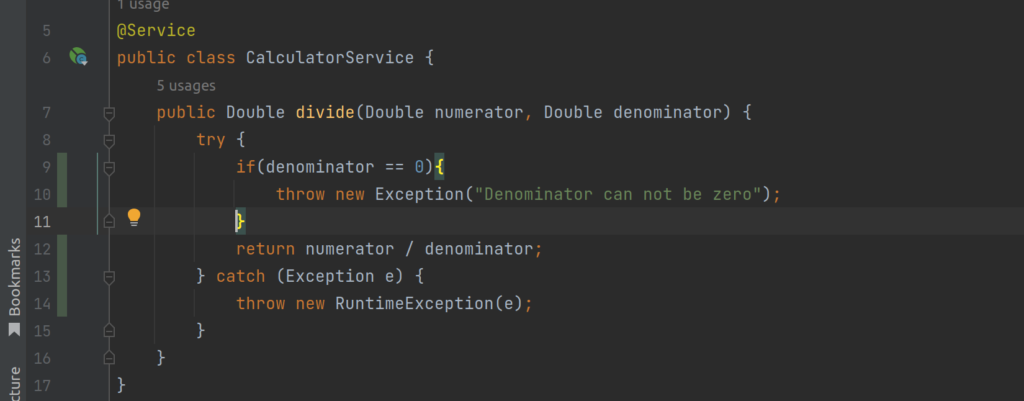
Here, we have completed the testing of CalculatorService.divide method with 100% coverage.
SUREFIre
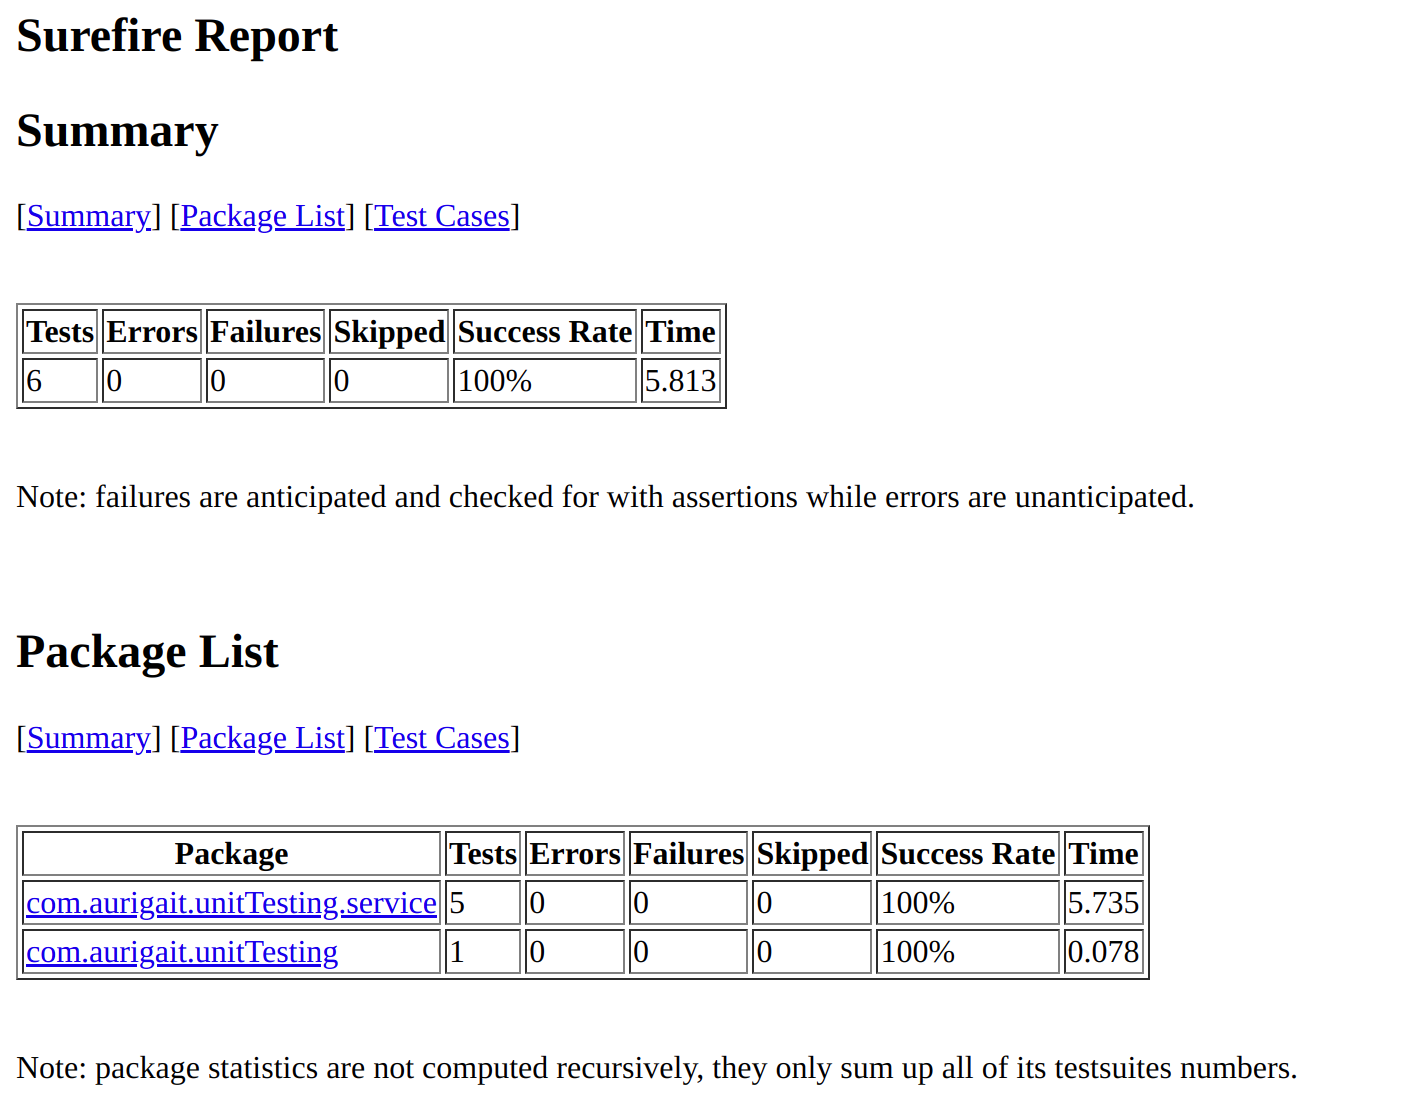
To get a detailed report of the test case you can also use surefire for report generation.
Command: mvn surefire-report:report.
After the successful execution of this command, you will get a detailed report generated automatically inside /target/site/surefire-report.html file. Now open this file in any browser to see the result.
Conclusion
In this article, we learned about unit testing and the need for unit testing, testing spring boot applications with JUnit with 100% coverage. I really hope you enjoyed it and had fun reading it.😊
Stay safe.
References
Related content
Auriga: Leveling Up for Enterprise Growth!
Auriga’s journey began in 2010 crafting products for India’s
